
Design 1: Sweetheart Ombre Blush
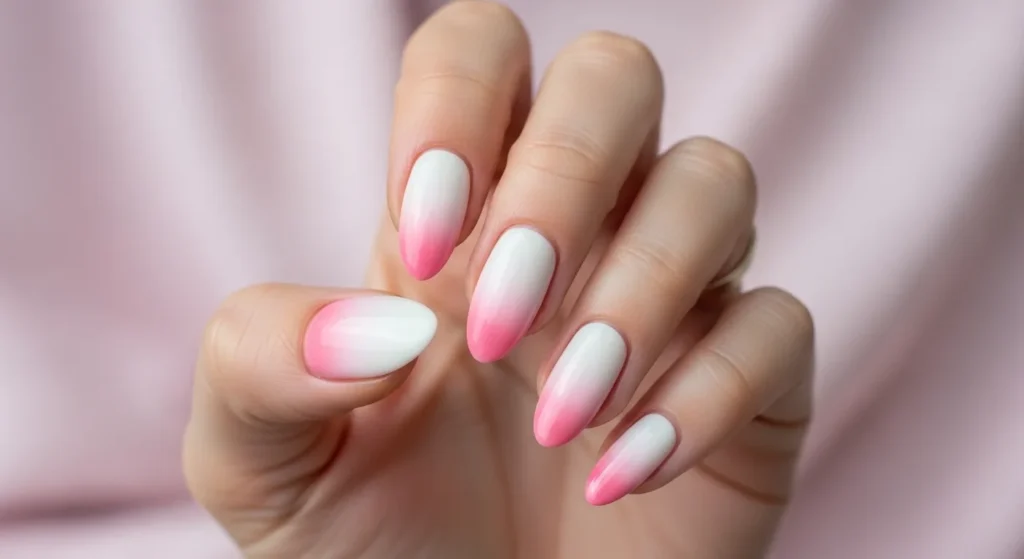
The Sweetheart Ombre Blush design is the epitome of romantic elegance, perfect for those who love subtle sophistication. This design creates a dreamy transition from pure white to rosy pink, symbolizing the gentle progression of falling in love. The ombre effect gives your nails a soft, feminine appearance that works beautifully for Valentine’s Day dates, parties, or everyday wear throughout February.
Colors Used:
- Base: Creamy white or soft ivory polish
- Gradient: Soft rose pink or dusty pink
- Top coat: High-gloss clear finish

Application Technique: Start with clean, shaped nails and apply a base coat. Paint the entire nail with the white polish as your base and let it dry completely. Using a makeup sponge, apply both white and pink polish side by side on the sponge, then gently dab it onto each nail, starting from the tip and working toward the cuticle with a bouncing motion. The colors will blend naturally where they meet. Repeat 2-3 times for intensity, letting each layer dry slightly. Finish with a glossy top coat to seal the design and create that beautiful shine. Clean up around the edges with a small brush dipped in nail polish remover for a professional finish.
Design 2: Classic Red Romance

Nothing says Valentine’s Day quite like a classic red manicure, and the Classic Red Romance design delivers exactly that with perfection. This bold, confident look is for those who appreciate timeless elegance and aren’t afraid to make a statement. The rich cherry red shade symbolizes passion, love, and confidence, making it the ultimate Valentine’s Day nail choice that never goes out of style.
Colors Used:
- Main color: Classic cherry red or true red polish
- Base coat: Clear strengthening base
- Top coat: Ultra-glossy clear finish
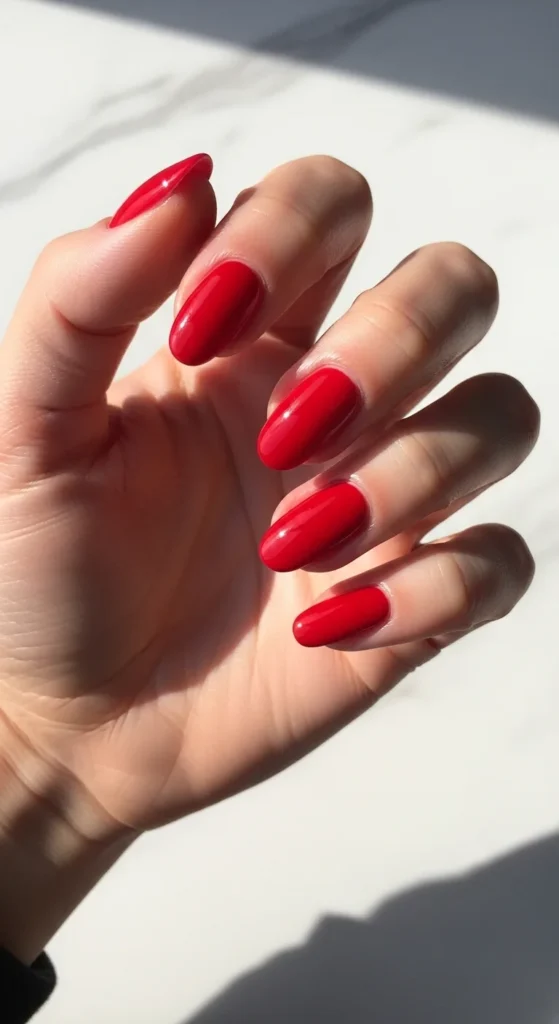
Application Technique: Begin with clean, filed nails and push back your cuticles gently. Apply a clear base coat to protect your nails and create a smooth surface. Once dry, apply the first coat of red polish using thin, even strokes – start from the base of the nail near the cuticle and sweep toward the tip in one smooth motion. Let this first coat dry for about two minutes. Apply a second coat for full opacity and rich color depth, using the same technique. The key to this design is patience and precision – take your time with each nail. Finish with a high-gloss top coat that will make your nails shine like glass and protect the color from chipping. This classic look requires minimal effort but delivers maximum impact.
Design 3: Pink Heart Accent
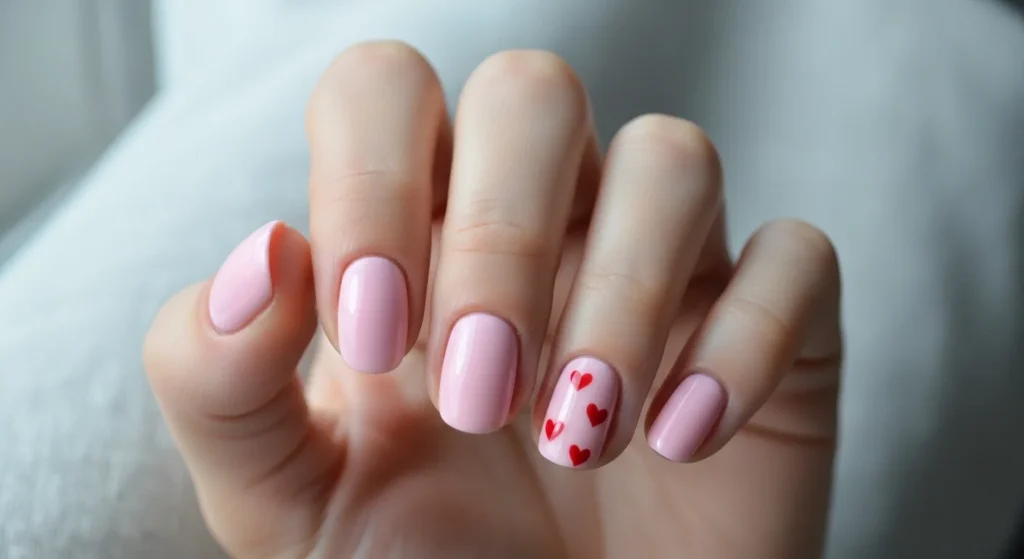
The Pink Heart Accent design is perfect for those who want a touch of Valentine’s spirit without going overboard. This charming design combines the sweetness of baby pink with the playfulness of tiny hand-painted hearts, creating a look that’s both adorable and sophisticated. The accent nail approach keeps the design simple and wearable while still celebrating the holiday in a fun way.
Colors Used:
- Base color: Baby pink or soft blush pink
- Accent details: Bright red or deep crimson for hearts
- Base and top coat: Clear polish
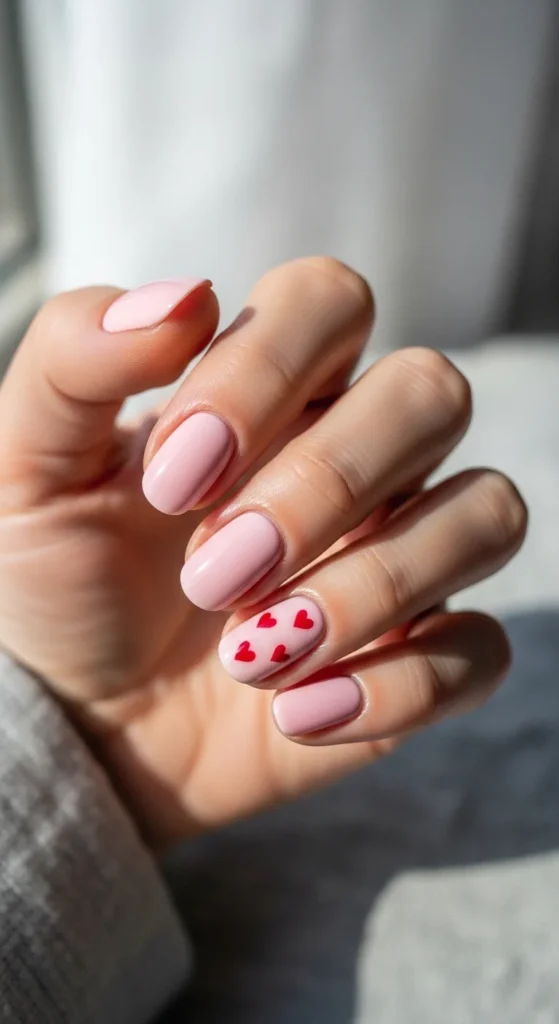
Application Technique: Start with a base coat on all nails and let it dry. Apply two coats of baby pink polish to all ten nails, allowing each coat to dry thoroughly between applications. Once completely dry, focus on your ring fingers (or whichever finger you choose as your accent). Using a small dotting tool or a toothpick, carefully create small heart shapes by placing two dots side by side and dragging them down to meet at a point, forming a heart. You can also use a thin nail art brush for more control. Create 2-4 small hearts per accent nail, spacing them artistically. Let the hearts dry completely before applying your top coat over all nails to seal and protect your design. This technique is beginner-friendly and allows for imperfect hearts that still look charming and handmade.
Design 4: French Tip Love
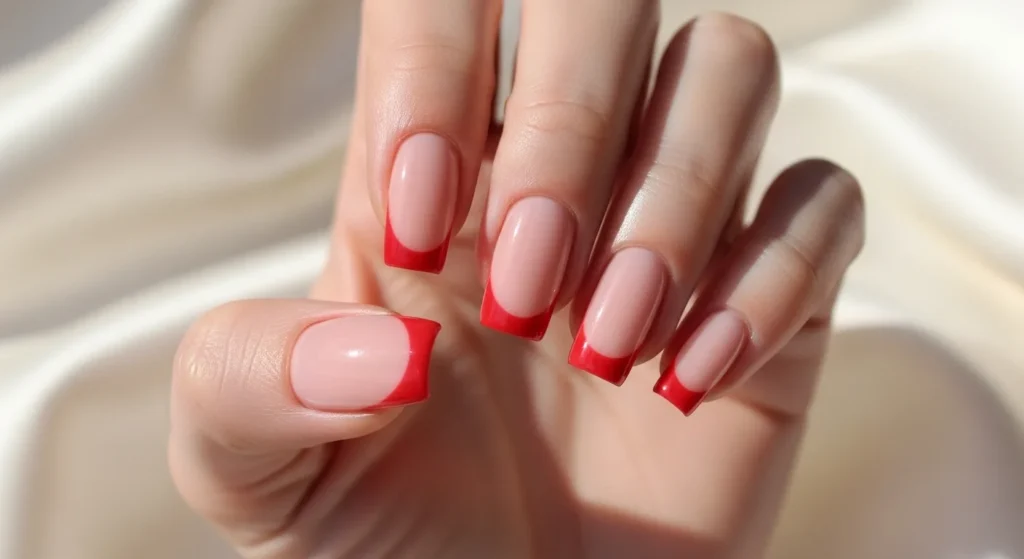
The French Tip Love design takes the classic French manicure and gives it a romantic Valentine’s Day twist. By replacing the traditional white tips with a beautiful soft red, this design becomes perfect for the season of love while maintaining that sophisticated, polished look that French manicures are famous for. It’s ideal for both casual and formal Valentine’s celebrations.
Colors Used:
- Base color: Nude pink or natural beige
- Tip color: Soft red or coral-red
- Base and top coat: Clear polish
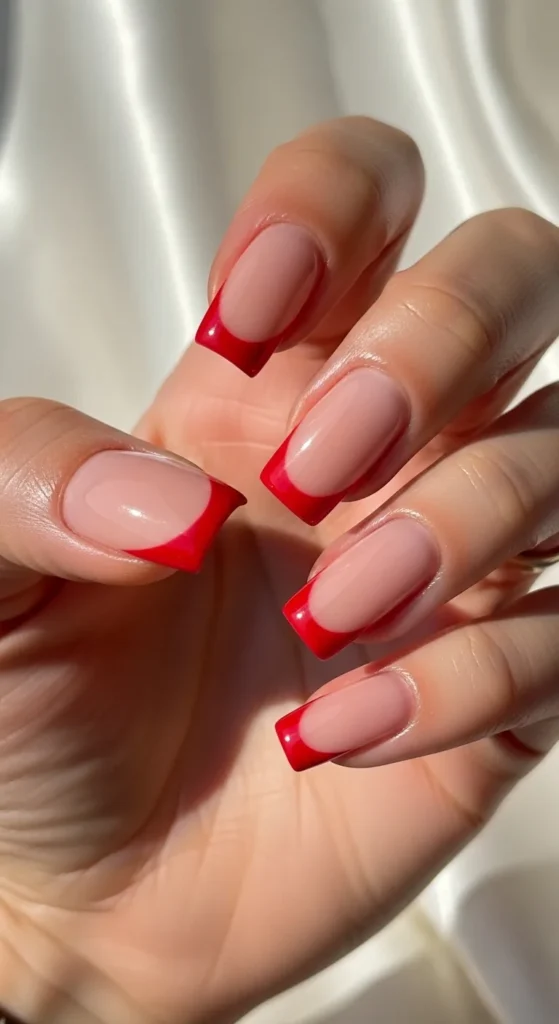
Application Technique: Begin with a clear base coat and let it dry. Apply two coats of your nude pink base color to all nails, ensuring even coverage and allowing each coat to dry. For the tips, you have two options: use French manicure guide strips for perfectly curved lines, or freehand with a steady hand and a good brush. Apply the red polish to just the tips of each nail in a smooth curved line that follows the natural curve of your nail. The tip should be about 2-3mm wide depending on your nail length. Take your time with each nail and use a cleanup brush dipped in acetone to perfect the curved line if needed. Once all tips are dry, seal everything with a glossy top coat. This design looks professional and clean, making it perfect for those who want Valentine’s flair with workplace-appropriate style.
Design 5: Minimalist Love Line

For the modern minimalist who appreciates clean lines and contemporary design, the Minimalist Love Line is the perfect Valentine’s Day nail art. This design proves that less is truly more, using a simple vertical line to create visual interest and celebrate the holiday in a subtle, sophisticated way. It’s perfect for those who want something different from traditional Valentine’s designs.
Colors Used:
- Base color: Nude, pale pink, or soft beige
- Line detail: Bright red or crimson
- Top coat: Matte or satin finish
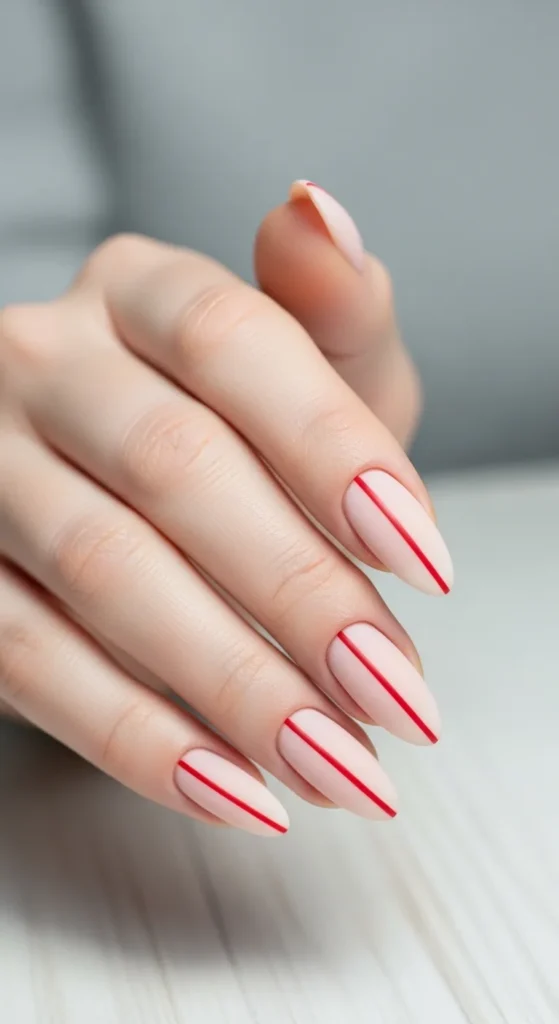
Application Technique: Apply a base coat and let it dry completely. Follow with two coats of your nude or pale pink base color, ensuring smooth, even application. Allow this to dry thoroughly – this is crucial for clean line work. Using a thin striping brush or a nail art pen with red polish, carefully paint a single straight line down the center of each nail from the cuticle area to the tip. Keep your hand steady and work slowly for the straightest lines. If you’re not confident with freehand lines, you can use thin striping tape as a guide – place it down the center, paint alongside it, and remove it while the polish is still wet. Once all lines are complete and dry, apply a matte or satin top coat for a modern finish. This design is surprisingly easy once you get the hang of it and looks incredibly chic and intentional.
Design 6: Glitter Heart Tips

Add some sparkle to your Valentine’s Day with the Glitter Heart Tips design! This glamorous look combines the elegance of a French manicure with the festive fun of glitter, creating nails that literally shine with love. The rose gold or pink glitter catches the light beautifully, making your hands sparkle with every gesture – perfect for romantic dinners or Valentine’s parties.
Colors Used:
- Base color: Soft white, cream, or pale pink
- Tip color: Rose gold, pink, or red glitter polish
- Base and top coat: Clear polish (extra glossy top coat recommended)
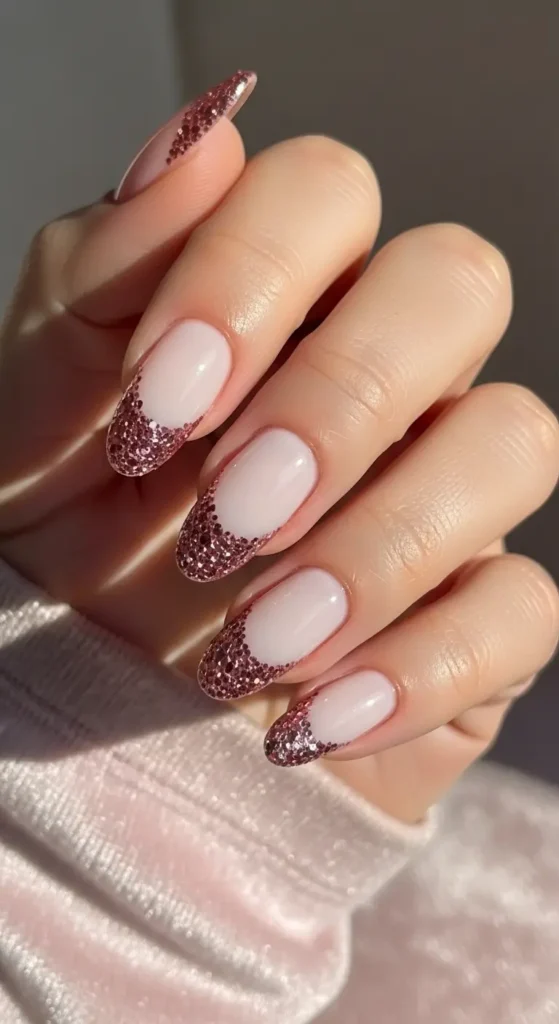
Application Technique: Start with a base coat followed by two coats of your light base color, allowing proper drying time between coats. Once your base is completely dry, it’s time for the glitter tips. Using the glitter polish brush or a small nail art brush, carefully apply the glitter polish to the tips of your nails in a curved French tip style. The glitter should cover about one-quarter of your nail in a smooth curve. You may need 2-3 coats of glitter for full opacity and maximum sparkle – allow each layer to dry before adding the next. The key with glitter is patience and building up the coverage gradually. Once your glitter tips are complete and dry, seal everything with a thick layer of glossy top coat. This not only protects your design but also smooths out the glitter texture and makes the sparkle even more brilliant. Reapply top coat every few days to maintain the shine and prevent glitter from lifting.
Design 7: Candy Stripe Sweetness
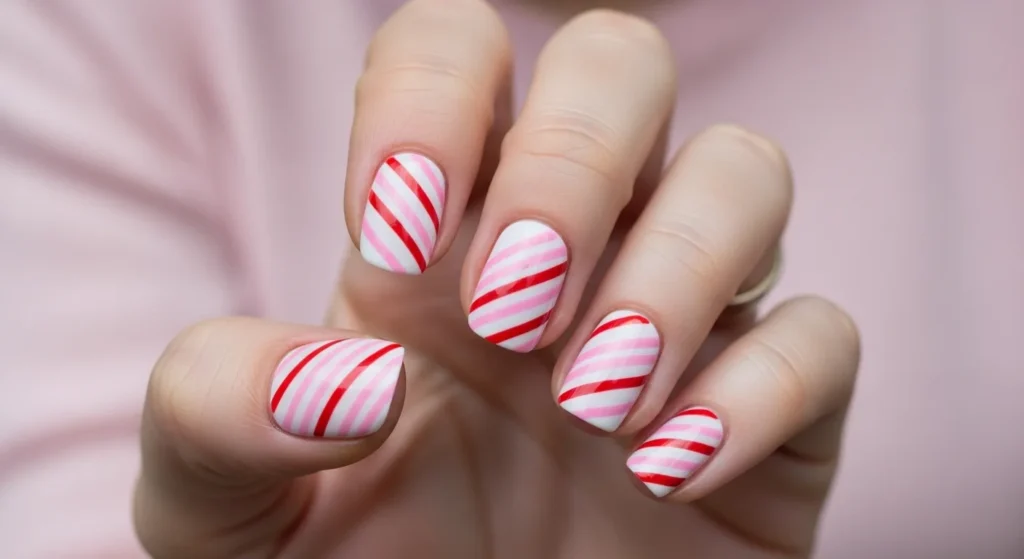
Inspired by classic Valentine’s candies and sweet treats, the Candy Stripe Sweetness design brings a playful, youthful energy to your Valentine’s Day look. The diagonal stripes in red and pink create a dynamic, eye-catching pattern that’s fun without being overwhelming. This design is perfect for those who want to embrace the playful side of Valentine’s Day.
Colors Used:
- Base color: White or pale pink
- Stripe colors: Bright red and hot pink (alternating)
- Base and top coat: Clear glossy polish
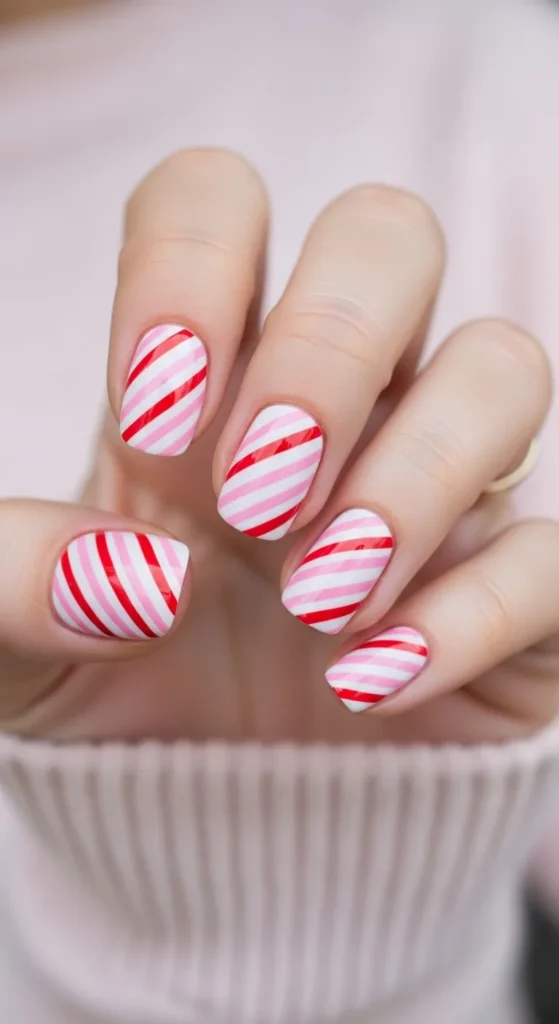
Application Technique: Apply a base coat and let dry, then apply two coats of your white or pale pink base color. Allow this to dry completely – this design requires a dry base for clean lines. For the stripes, you’ll need a thin striping brush or nail art pen. Starting from one corner of the nail, paint thin diagonal lines across the nail to the opposite corner. Alternate between red and pink, spacing the lines evenly (about 2mm apart). Work slowly and keep your lines as straight as possible. If you’re worried about freehand lines, you can use thin striping tape as guides – apply strips diagonally across the nail, paint between them, and remove while wet. The diagonal direction creates visual interest and makes the design more dynamic than vertical or horizontal stripes. Once all stripes are complete and dry, apply a glossy top coat to seal and protect. This design has a retro candy shop vibe that’s perfect for Valentine’s celebrations.
Design 8: Matte Mauve Romance
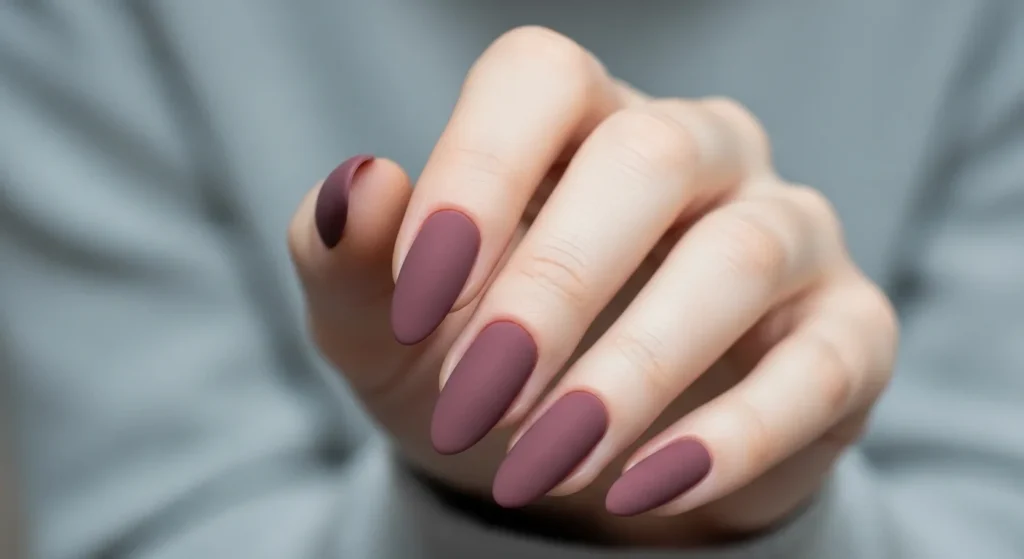
For those who prefer understated elegance over bold statements, the Matte Mauve Romance design offers a sophisticated take on Valentine’s Day nails. The dusty mauve color is romantic without being overtly pink or red, and the matte finish gives it a modern, fashion-forward edge. This design is perfect for the minimalist who still wants to acknowledge the romantic season.
Colors Used:
- Main color: Matte mauve, dusty rose, or muted purple-pink
- Base coat: Clear strengthening base
- Top coat: Matte finish top coat
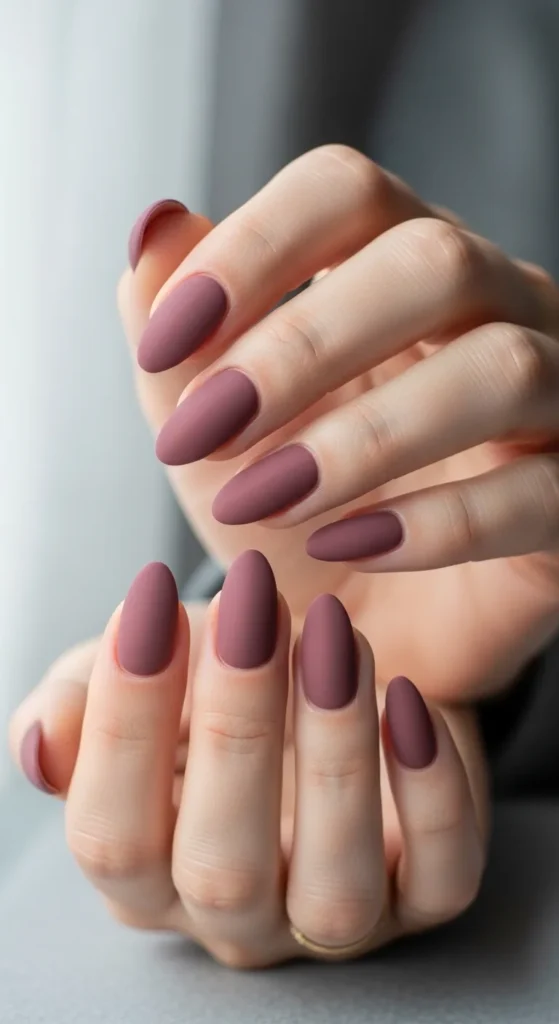
Application Technique: Begin with clean, shaped nails and apply a clear base coat for protection. Once dry, apply your first coat of mauve polish using smooth, even strokes. Matte polishes can sometimes be thicker, so work with thin coats rather than trying to achieve full coverage in one layer. Allow the first coat to dry for a few minutes, then apply a second coat for rich, even color. Let this dry thoroughly. The final step is crucial for this design – apply a matte top coat over all nails. This transforms any remaining shine into that beautiful velvety, matte finish. Apply the matte top coat in thin, even layers without going over the same area multiple times, as this can create streaks. The result is a sophisticated, touchable finish that looks expensive and modern. This design is incredibly chic and works for any occasion throughout February, not just Valentine’s Day itself.
Design 9: Pearl Dot Elegance
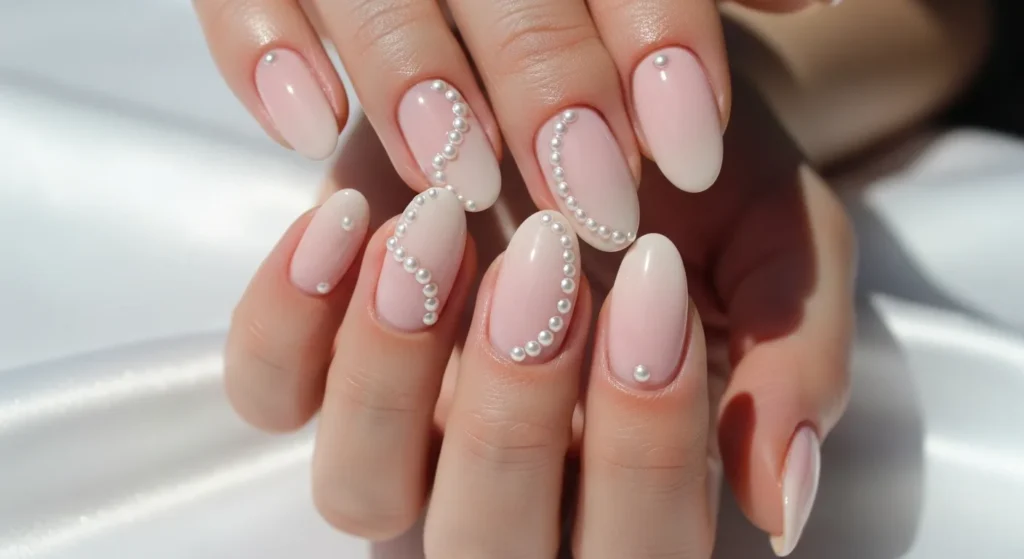
The Pearl Dot Elegance design brings a touch of luxury and refinement to your Valentine’s Day manicure. The combination of soft blush pink and delicate pearl dots creates a look that’s both romantic and sophisticated, reminiscent of bridal elegance. This design is perfect for formal Valentine’s dinners, weddings, or any occasion where you want to look polished and put-together.
Colors Used:
- Base color: Soft blush pink or pale rose
- Accent details: White pearl dots or pearl nail art beads
- Base and top coat: Clear glossy polish
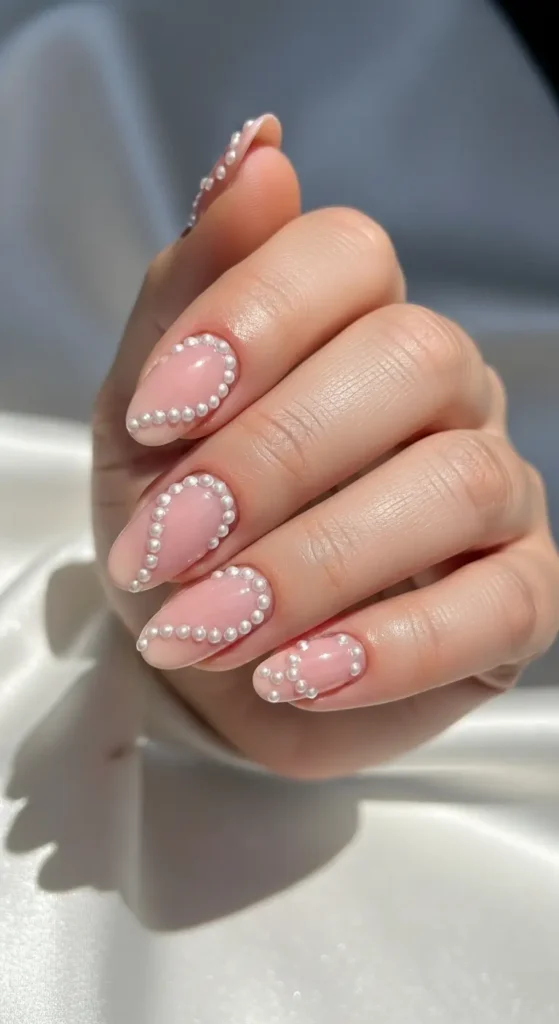
Application Technique: Start with a base coat, then apply two coats of your blush pink base color, allowing each to dry properly. Once your base is completely dry, it’s time to add the pearl dots. You have two options: use white polish with a dotting tool to create painted dots, or use actual pearl nail art beads for a three-dimensional effect. For painted dots, dip a small dotting tool (or the tip of a bobby pin) into white polish and gently press it onto your nail to create perfect round dots. Arrange them in small clusters, curved lines, or scattered patterns – vary the placement on each nail for visual interest. For three-dimensional pearl beads, apply a tiny dot of clear polish where you want each pearl, then use tweezers to place the bead onto the wet polish. Press gently to secure. Allow everything to dry, then carefully apply a glossy top coat. If using beads, apply the top coat around them rather than over them to maintain their dimensional quality. This design looks delicate and expensive while being surprisingly simple to create.
Design 10: Two-Tone Valentine

The Two-Tone Valentine design is for those who can’t choose between pink and red – so why not wear both? This modern approach creates visual interest through color blocking, with deep burgundy and soft pink alternating across your fingers. The contrast is bold yet balanced, creating a look that’s contemporary and eye-catching while still being perfectly appropriate for Valentine’s Day.
Colors Used:
- Color one: Deep burgundy, wine red, or oxblood
- Color two: Baby pink, soft pink, or blush
- Base and top coat: Clear glossy polish

Application Technique: Start with a base coat on all nails. Once dry, decide on your alternating pattern – a classic approach is to paint the thumb, middle finger, and pinky in one color, and the index and ring fingers in the other color. This creates a balanced, intentional look. Apply two coats of each color to the designated nails, working carefully to keep the application neat. The beauty of this design is that you’re working with solid colors, so the application is straightforward – just take your time and ensure even coverage. Allow each color to dry completely. The contrast between the deep, rich burgundy and the soft, sweet pink creates a dynamic look that’s modern and fashion-forward. Finish all nails with a glossy top coat to unify the look and add shine. This design is perfect for those who want something different from traditional single-color manicures and love playing with color combinations. You can also switch up which fingers get which color based on your preference.
Design 11: Soft Coral Sunset
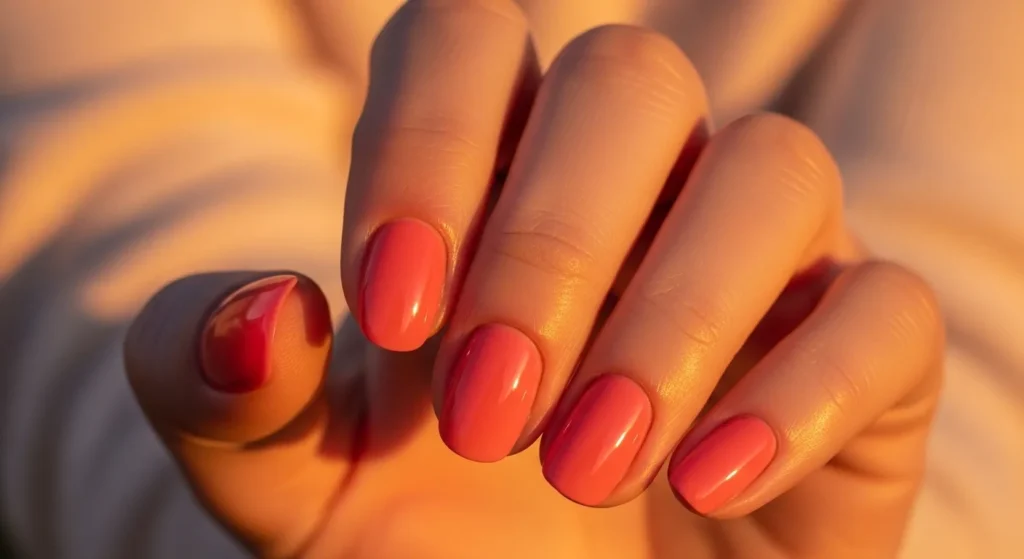
The Soft Coral Sunset design offers a warmer, more unique take on Valentine’s Day nails. Instead of traditional pinks and reds, this coral shade brings warmth and energy while still feeling romantic and appropriate for the season. The peachy-pink undertones are universally flattering and give off a healthy, sun-kissed glow that’s perfect for those who want something a little different.
Colors Used:
- Main color: Coral, peachy-pink, or warm salmon pink
- Base coat: Clear strengthening base
- Top coat: High-gloss clear finish
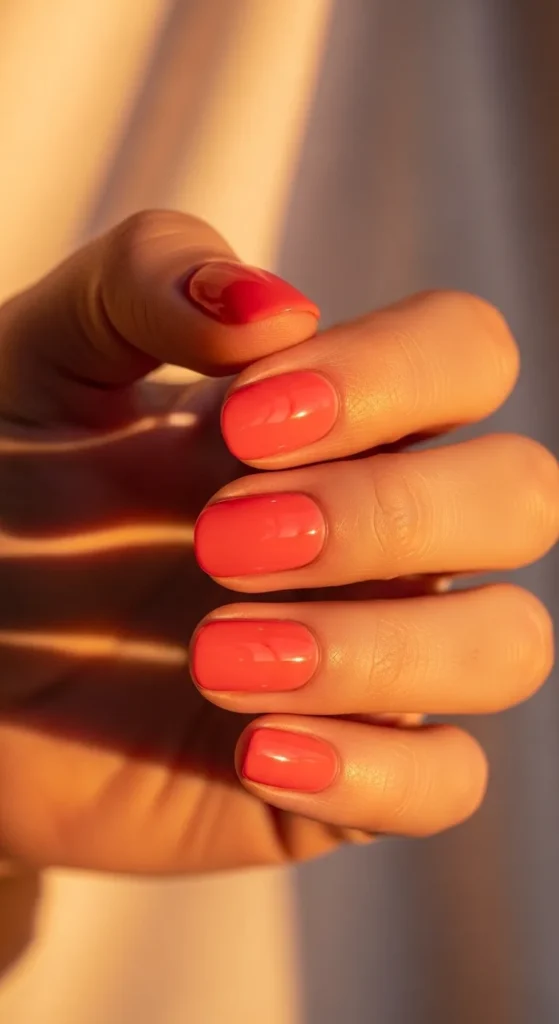
Application Technique: Begin with clean, filed nails and apply a clear base coat. Let it dry completely. Coral polishes can sometimes appear sheer, so proper application technique is important for rich color. Apply your first coat of coral polish in thin, even strokes, starting from the cuticle and sweeping toward the tip. Don’t worry if the first coat looks a bit streaky or sheer – this is normal. Allow it to dry for two to three minutes. Apply a second coat using the same technique, and you’ll see the color become more opaque and vibrant. For some coral shades, a third thin coat may be needed for full opacity. The key is to use thin coats rather than thick ones to avoid bubbling and to ensure even drying. Once your color is fully dry, apply a high-gloss top coat to seal the color and add that beautiful shine. This warm, peachy color is perfect for Valentine’s Day but also transitions beautifully into spring, making it a versatile choice that you’ll want to wear beyond February.
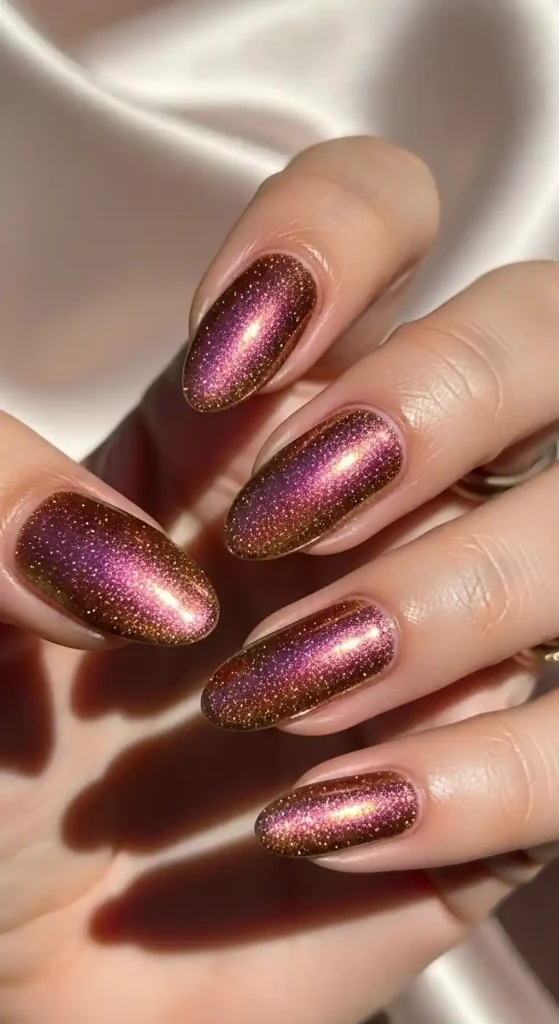
Design 12: Rose Gold Shimmer

End your Valentine’s Day nail journey with the show-stopping Rose Gold Shimmer design! This glamorous look combines the romantic appeal of rose tones with the luxury of metallic shimmer, creating nails that are truly special. The multidimensional shimmer catches light from every angle, making your hands sparkle throughout your Valentine’s celebrations. This design is perfect for those who want maximum impact with minimal effort.
Colors Used:
- Main color: Rose gold shimmer or metallic pink-gold polish
- Base coat: Clear strengthening base
- Top coat: Ultra-glossy clear finish
Application Technique: Start with a clear base coat to protect your nails and create a smooth surface for the shimmer polish. Once dry, it’s time to apply your rose gold shimmer. Shimmer polishes can be a bit tricky, so here are some tips: shake the bottle well before use to distribute the shimmer particles evenly. Apply the first coat in smooth, even strokes without going over the same area multiple times – this prevents the shimmer from clumping. The first coat may look a bit sheer, which is perfect. Let it dry for two to three minutes. Apply a second coat using the same technique, and you’ll see the shimmer become more intense and the color more opaque. Some shimmer polishes benefit from a third thin coat for maximum sparkle and even coverage. Once your shimmer is completely dry, apply a thick layer of glossy top coat. This is crucial for shimmer polishes as it smooths out the texture of the shimmer particles and intensifies the shine. The result is nails that look like liquid metal – absolutely stunning for Valentine’s Day celebrations, date nights, or any time you want to feel glamorous and special.


