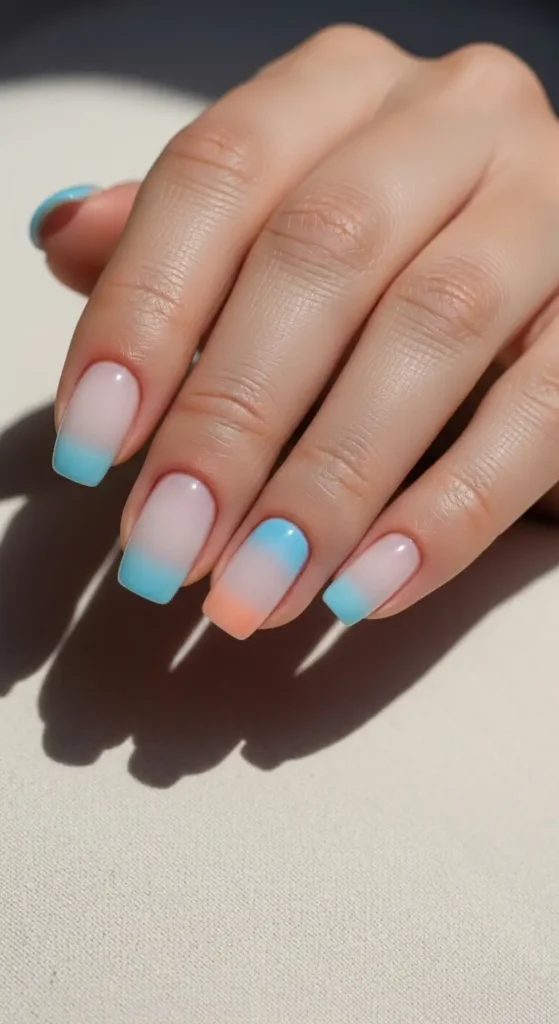
Design 1: “Morning Sky Sheer”
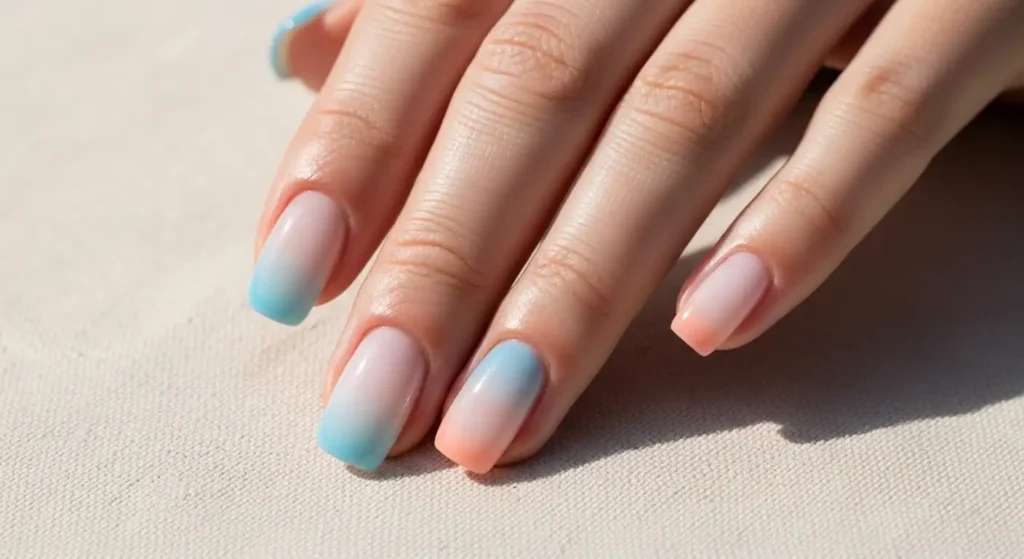
This design is the epitome of soft and simple. It starts with a barely-there, translucent milky base that lets the natural nail peek through. A whisper of soft, powdery blue gradients from the cuticle, fading into nothingness by the time it reaches the center of the nail. From the tip, a similar delicate gradient of warm, pale peach rises up to meet it, creating a hazy, cloud-like overlap in the middle. It’s a “no-makeup” makeup look for your nails, incredibly elegant and fresh. The colors are applied with an airy touch, ensuring the gradient is subtle and not stark.
Colors & Application:
- Colors: Milky White Sheer Base, Powder Blue, Warm Peach.
- Application: Apply two thin coats of the milky white sheer base. While it’s still slightly tacky, use a sponge with a very small amount of powder blue at the cuticle edge, dabbing lightly for a diffused effect. Repeat the process with the warm peach at the tip. Seal everything with a high-gloss top coat to blend the pigments.
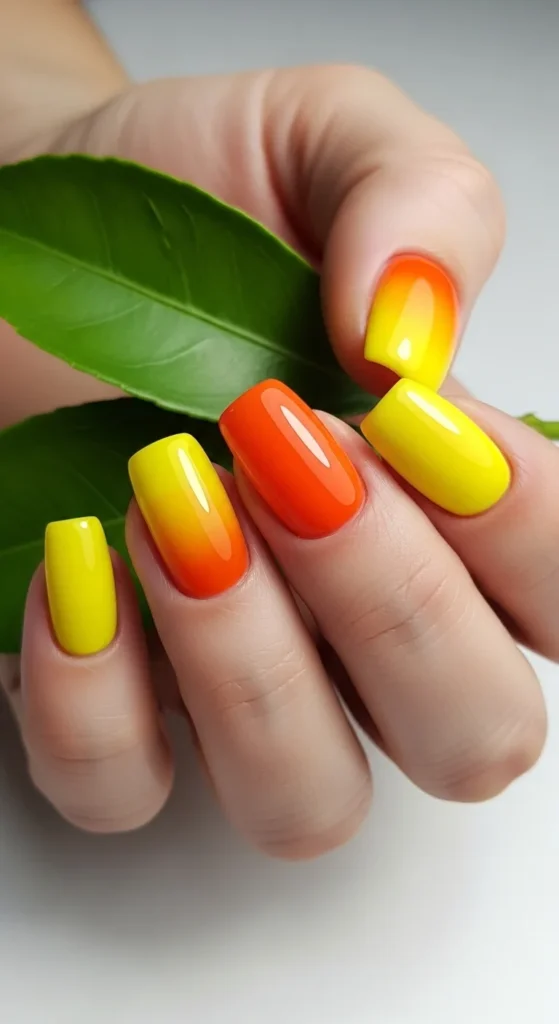
Design 2: “Citrus Squeeze Fade”
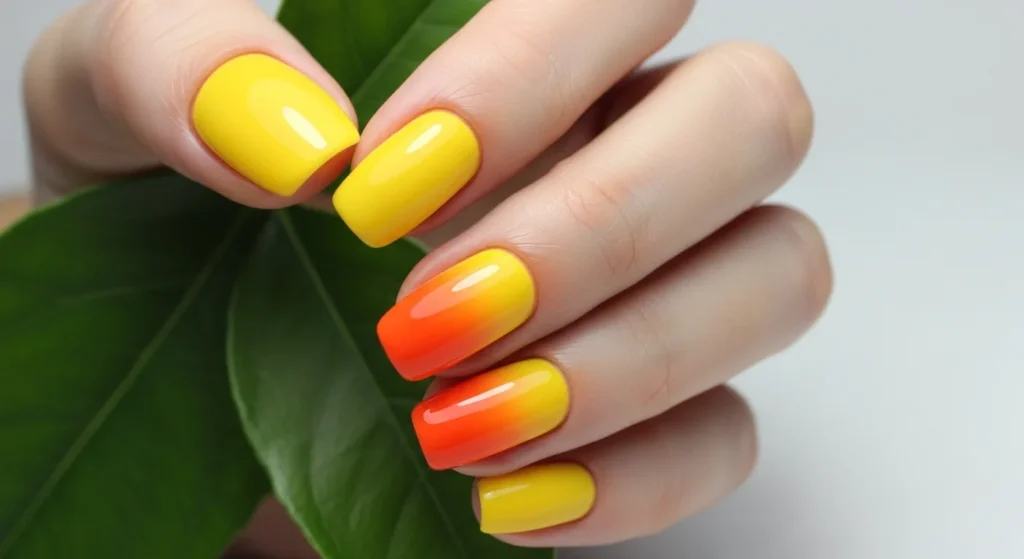
A zesty and vibrant design that’s perfect for summer. This gradient is a clean, two-finger accent on the ring and middle fingers, leaving the others in a matching solid glossy yellow. The ombre itself is a sharp, bright transition from a sun-kissed yellow at the cuticle to a juicy, ripe orange at the tip. The transition is smooth but the colors are bold, making it look like a slice of fresh citrus. The contrast between the solid matte-finish nails and the glossy gradient accent nails adds a layer of texture.
Colors & Application:
- Colors: Vibrant Sun Yellow, Juicy Orange.
- Application: For the solid nails, apply two coats of yellow matte top coat. For the accent nails, apply a white base first to make the colors pop. Then, sponge on yellow near the cuticle and orange at the tip, blending them in the middle. Finish with a super glossy top coat for contrast.
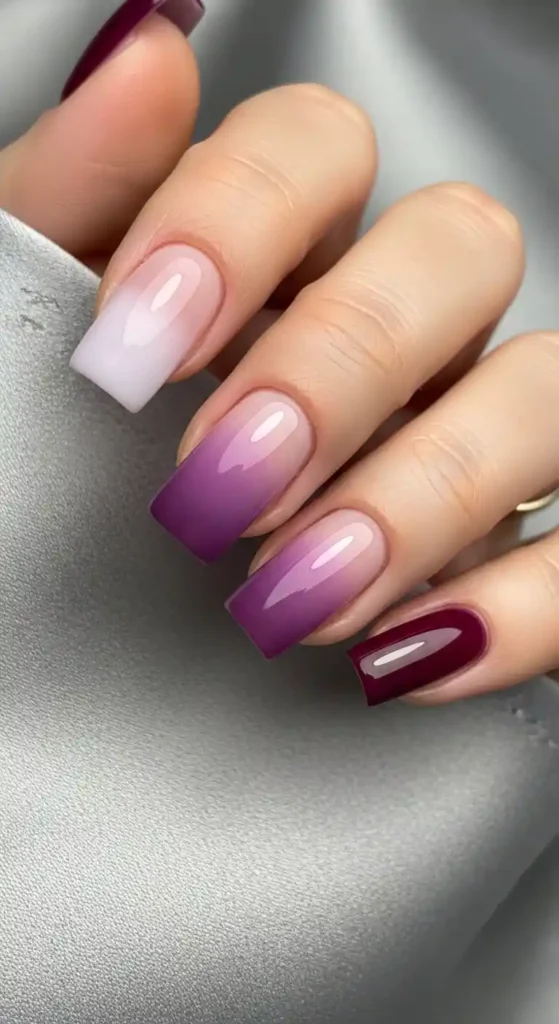
Design 3: “Lavender Haze Melt”
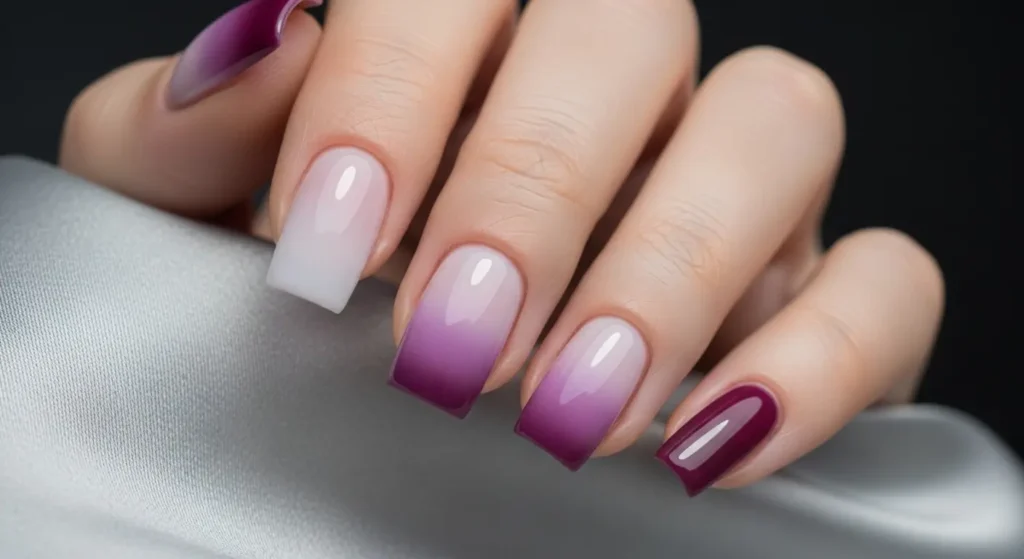
Inspired by dreamy, hazy evenings, this design features a soft, tonal gradient of purples. It starts with a pale, almost white lavender at the cuticle, gently deepening into a medium, romantic lavender in the nail’s center, and finally melting into a rich, velvety purple-plum at the tip. The effect is smooth and misty, like a watercolor painting. The shape is a soft square, which gives a modern touch to the romantic color palette.
Colors & Application:
- Colors: Pale White-Lavender, True Lavender, Deep Plum.
- Application: Start with a white base. Use a makeup sponge to layer the three colors, starting with the lightest near the cuticle and the darkest at the tip. Dab and roll the sponge to create a seamless melt. A high-shine top coat will smooth out any texture and deepen the colors.
Design 4: “Bronzed Desert Dunes”
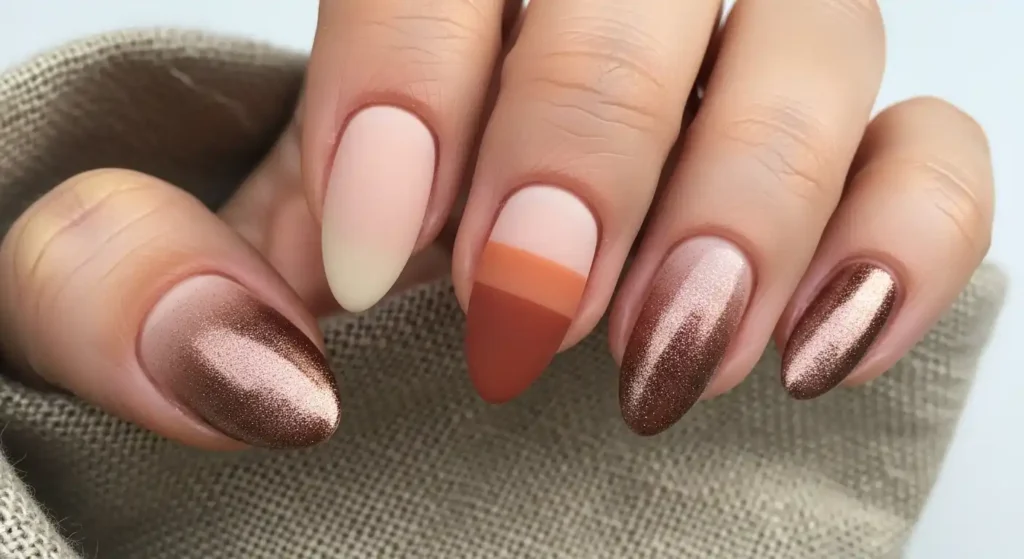
This design captures the warm, earthy tones of a desert landscape. The ombre runs horizontally across the nail, rather than vertically. The base is a soft, sandy beige. A band of warm terracotta sweeps across the middle of the nail, which then subtly fades into a shimmering, metallic bronze at the free edge. The metallic bronze catches the light beautifully, giving a sun-baked, glistening effect. It’s simple, modern, and warm.
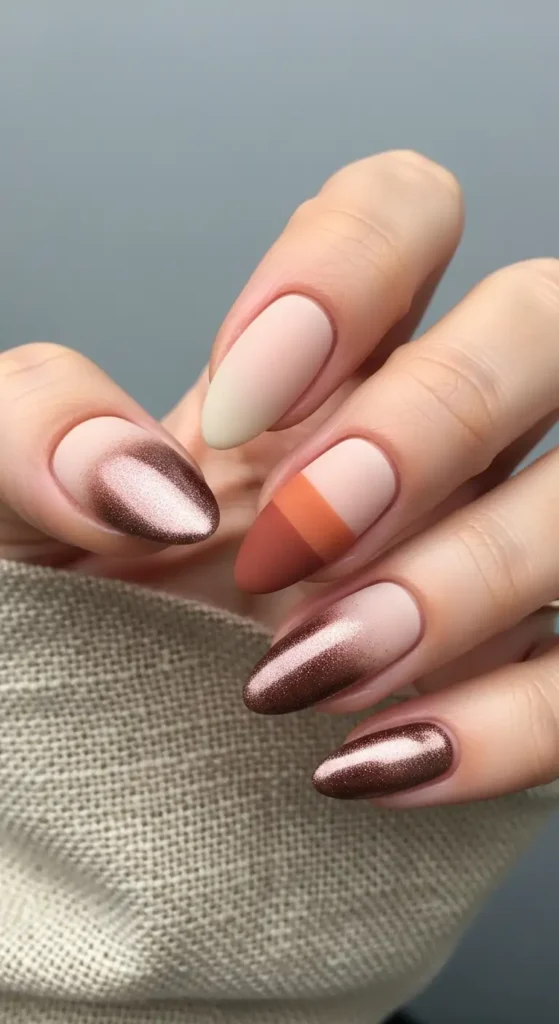
Colors & Application:
- Colors: Soft Sandy Beige, Warm Terracotta, Shimmering Metallic Bronze.
- Application: Apply a beige base. Then, apply the terracotta in a stripe across the center of a sponge and the bronze at the tip. Dab this onto the nail, focusing on blending the edges where the terracotta meets the beige and bronze.
Design 5: “Mint to Be Speckled”
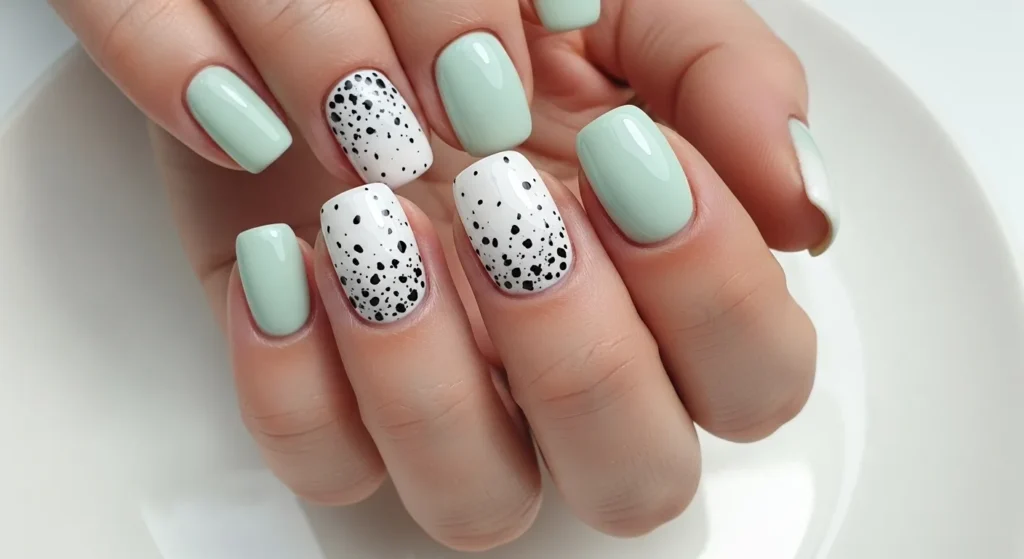
A playful and unique take on the gradient. A soft, refreshing mint green fades from the cuticle into a crisp, clean white at the tip. The twist is the delicate black speckling that is scattered across the white tip area, mimicking the look of a bird’s egg or a touch of fine art. The speckles are small, varied in size, and sparse, adding a completely unexpected and artistic element to a simple color fade.
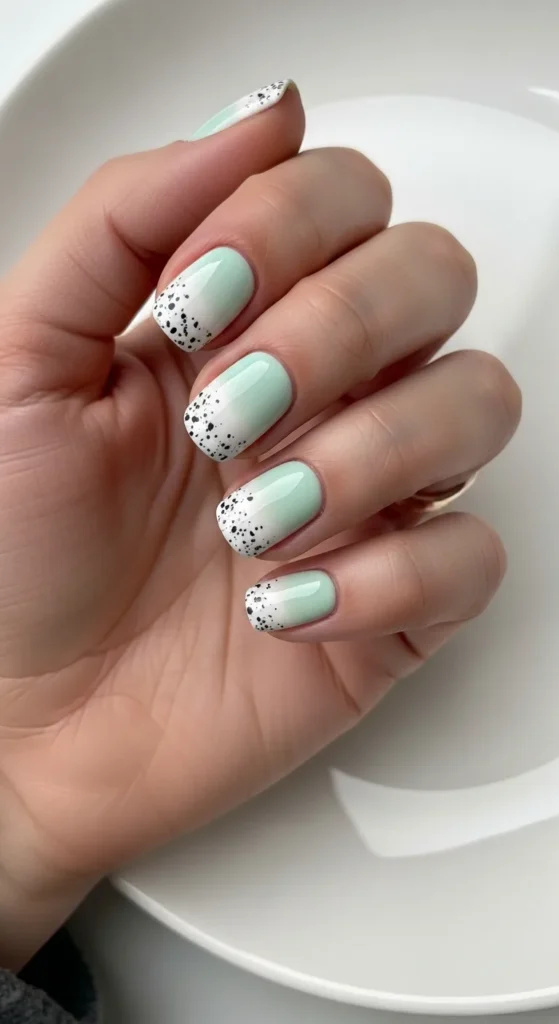
Colors & Application:
- Colors: Creamy Mint Green, Crisp White, Black.
- Application: Create the mint-to-white gradient using a sponge. Once the gradient is dry and sealed with a top coat, use a very fine dotting tool or a stiff, small brush (like an old clean mascara wand) to flick or dot tiny black specks onto the white tip area. Seal with another layer of top coat.
Design 6: “Copper Rose Chrome Fade”
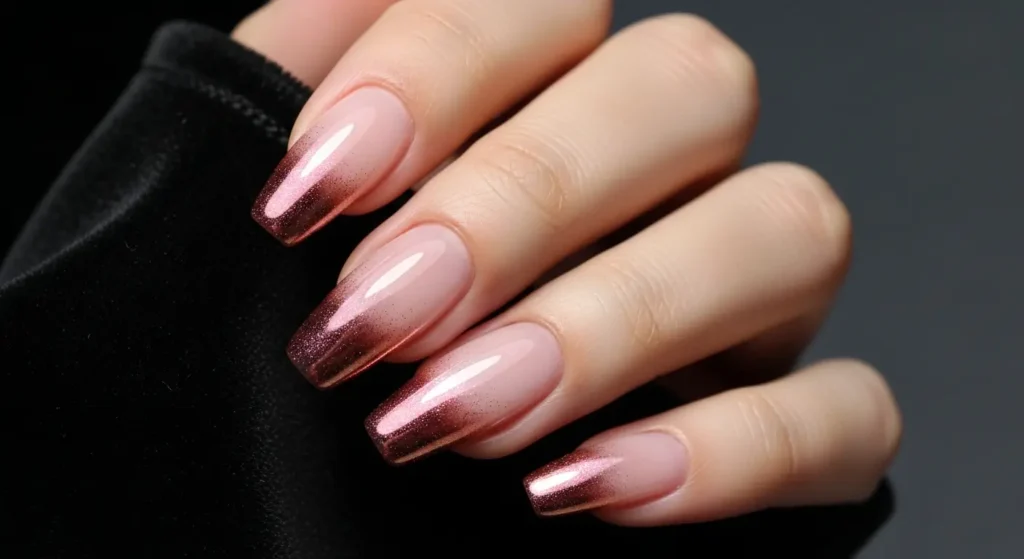
A design that blends the softness of a pink ombre with the high-shine of a chrome finish. It starts with a delicate, petal-pink at the cuticle that fades into a transparent, glossy center. The magic happens at the tip, which is dusted with a warm, coppery-rose chrome powder. The chrome is not solid but appears as a sheer, reflective shimmer that catches the light, giving the illusion of light reflecting off the tip of the nail.
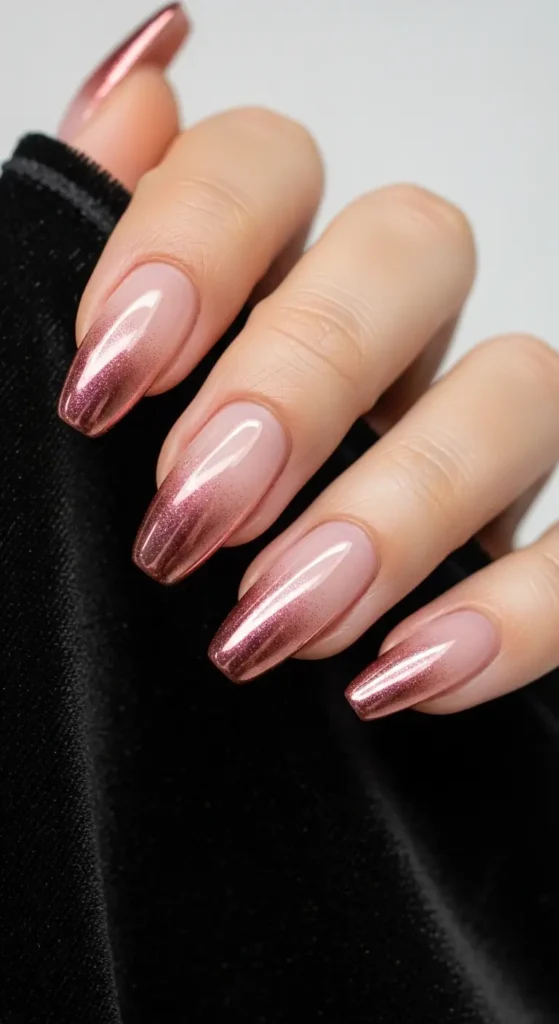
Colors & Application:
- Colors: Sheer Petal Pink, Copper-Rose Chrome Powder.
- Application: Apply a sheer pink base coat. Cure/let dry. Apply a no-wipe top coat to the tips only. Using an eyeshadow applicator or your finger, gently rub the chrome powder onto the tacky tip, fading it downwards slightly. Brush off the excess and seal the entire nail with a high-gloss top coat.
Design 7: “Denim Fade”
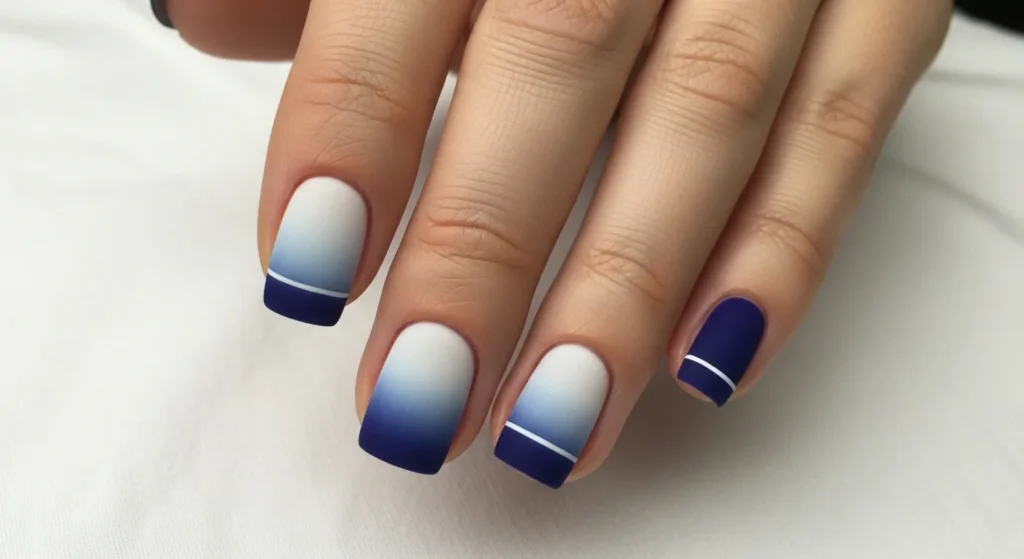
A cool and casual design inspired by the color of your favorite jeans. This ombre is a tonal fade of blues, mimicking the worn look of denim. It transitions from a faded, light sky blue at the cuticle to a deep, saturated indigo at the tip. A very fine, white thread-like line is painted along the curve of the smile line, mimicking the stitching on denim. It’s a simple detail that makes the design clever and wearable.
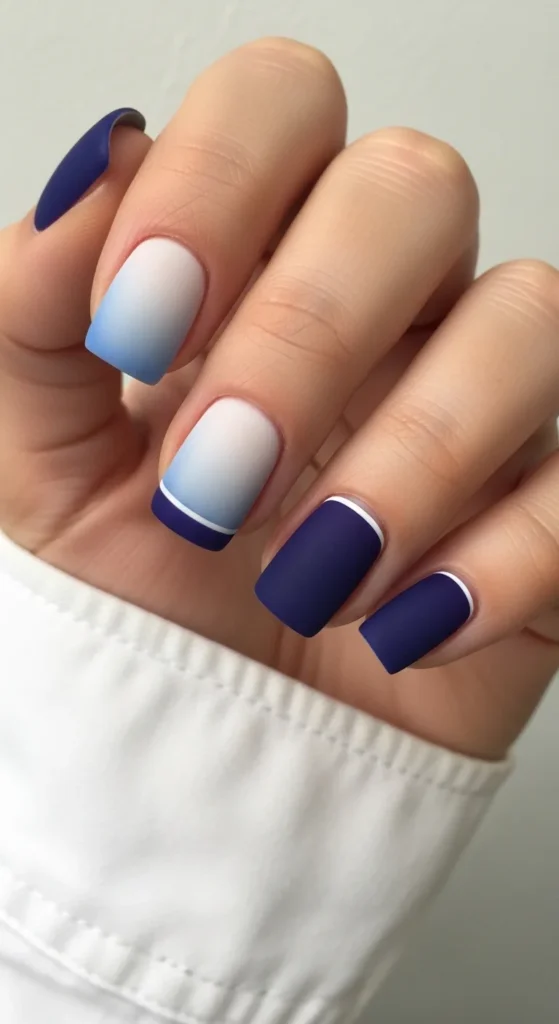
Colors & Application:
- Colors: Faded Sky Blue, Deep Indigo Blue, Bright White.
- Application: Create the blue-on-blue gradient with a sponge. Once dry, use a very fine liner brush and white polish to paint a thin, delicate curved line following the shape of the tip where the indigo is strongest. Finish with a matte or satin top coat for a fabric-like feel.
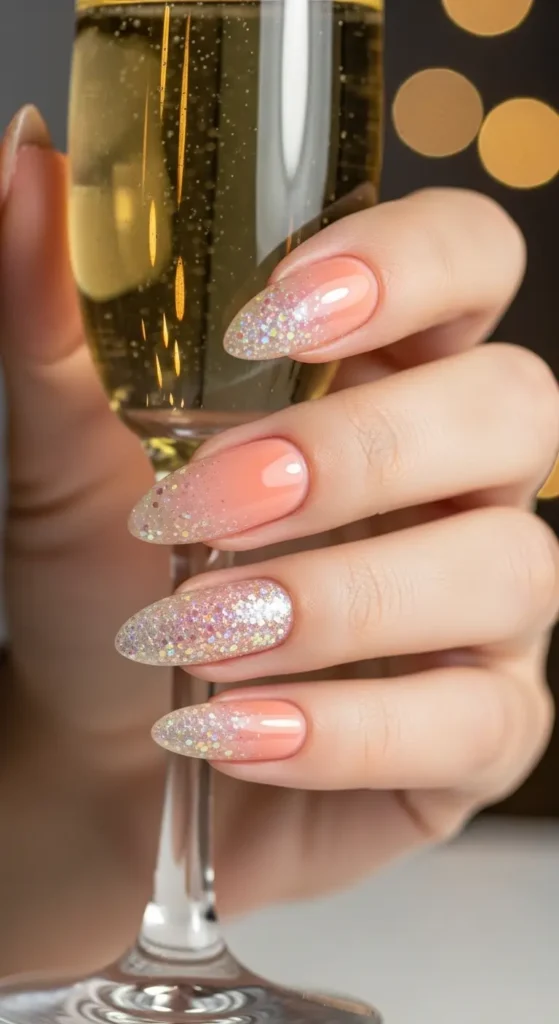
Design 8: “Peach Bellini Bubbles”
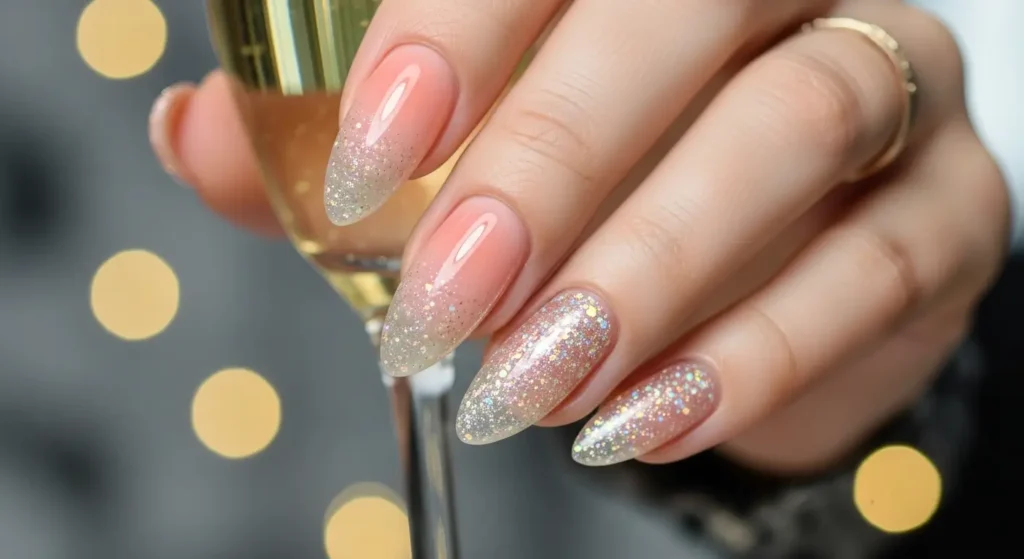
A celebration in a manicure. The base is a soft, juicy peach color that gradients into a sheer, sparkling champagne at the tips. To elevate it further, a scattering of ultra-fine, iridescent glitter is concentrated at the tips and fades slightly upward, mimicking the bubbles in a glass of Bellini. The glitter is subtle and catches the light in a delicate way, not chunky or overpowering.
Colors & Application:
- Colors: Juicy Peach, Sheer Champagne, Iridescent Ultra-Fine Glitter.
- Application: Apply a peach base. On a sponge, layer the sheer champagne and sprinkle a bit of the loose iridescent glitter onto the sponge before dabbing onto the tip. This will embed the glitter into the gradient. Seal with a generous glossy top coat.
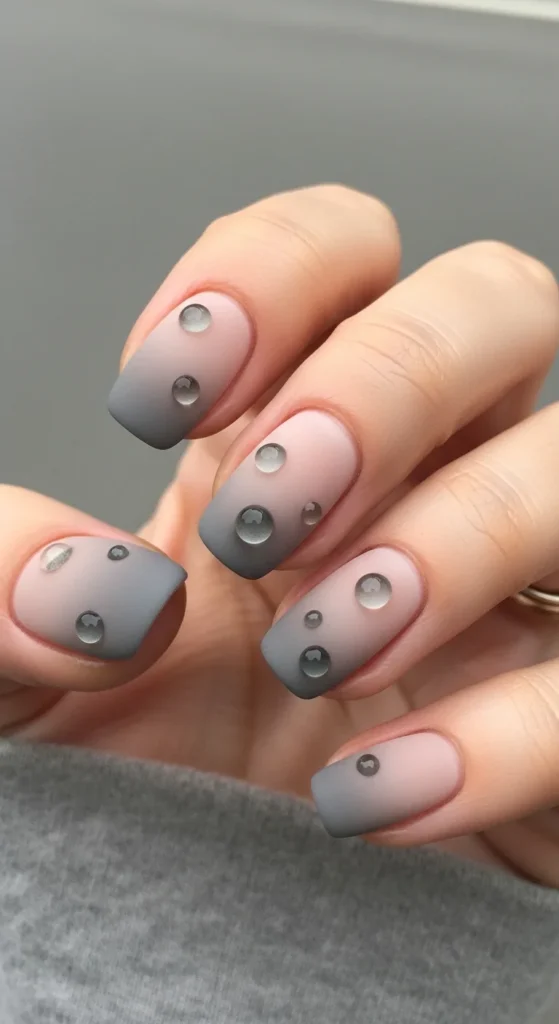
Design 9: “Greige Raindrops”
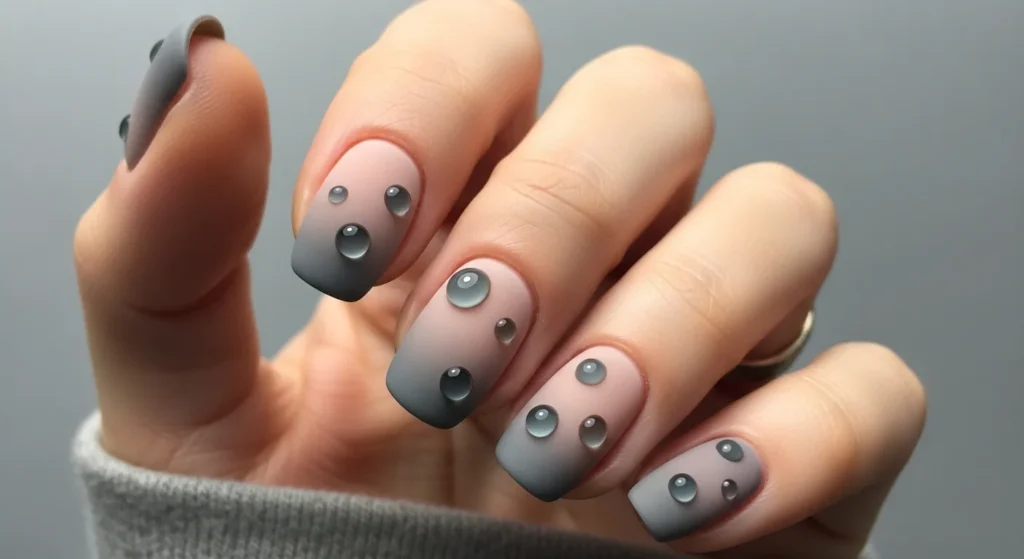
For those who love neutrals but want something different. This design features a simple, sophisticated gradient from a warm, light greige (grey-beige) at the cuticle to a deeper, cooler grey at the tip. The texture is the star here. A few clear, dimensional “raindrop” dots are applied over the gradient using a thick, clear gel or resin, creating a subtle 3D effect that catches the light and feels modern and fresh.
Colors & Application:
- Colors: Light Warm Greige, Deep Cool Grey, Clear Building Gel.
- Application: Create the greige-to-grey gradient and finish with a matte top coat. Once cured, use a dotting tool to place small drops of clear, thick gel or resin onto the nail. Use a UV lamp to cure them standing up, which gives them their 3D, rounded shape.
Design 10: “Electric Violet Flare”
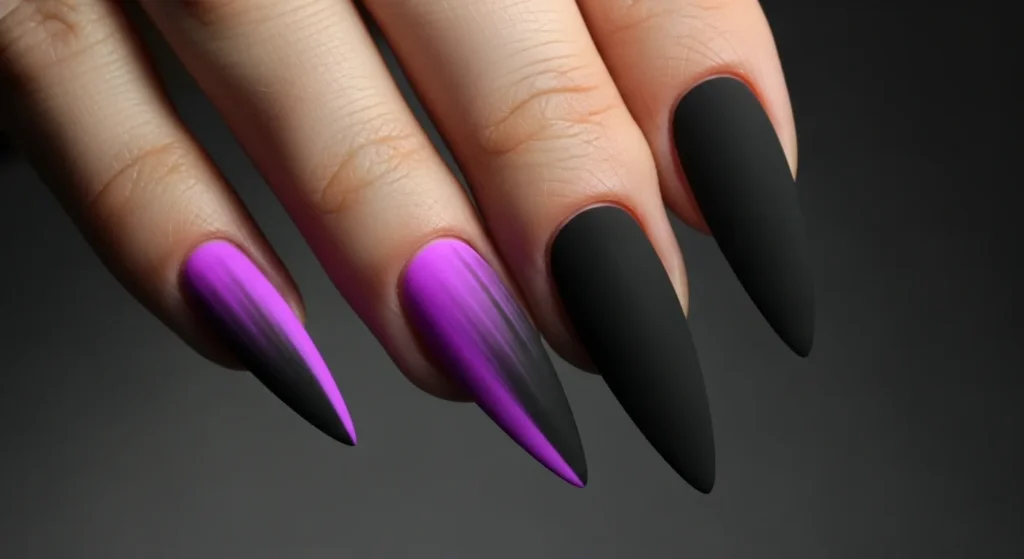
This design is all about bold, vibrant energy. It features a sharp, angled gradient that starts at the bottom corner of the nail (near the cuticle on one side) with a bright, electric violet. The color then flares out diagonally across the nail, fading into a deep, dark black at the opposite tip. The rest of the nail is left in a clean, glossy black. It’s a graphic, modern take on the ombre trend that is simple in concept but visually striking.
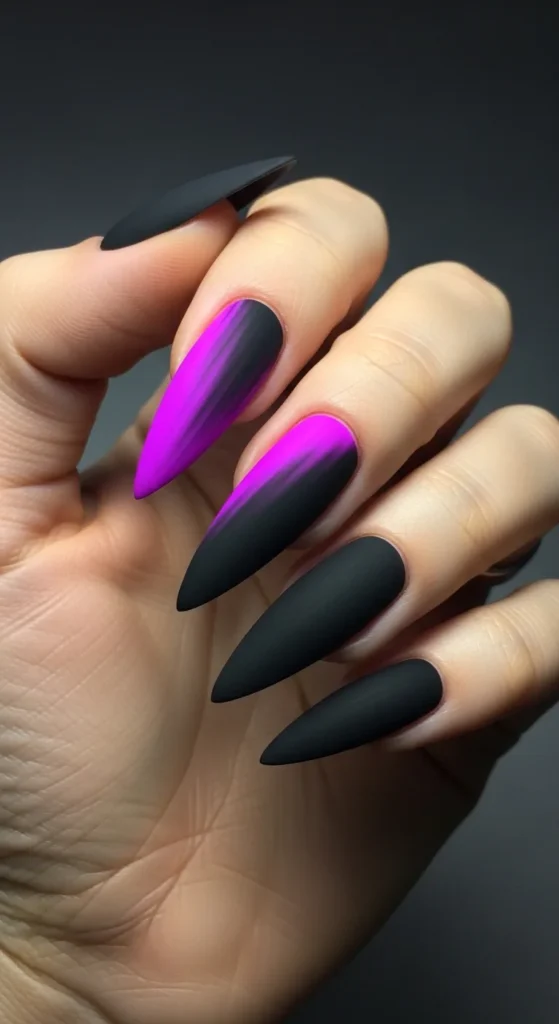
Colors & Application:
- Colors: Electric Violet, Deep Black.
- Application: Paint the entire nail with a matte black base. On a small, precise sponge, apply the electric violet to one corner. Carefully dab this onto the nail at an angle, building up the intensity and blending the edge where it meets the black. Keep the black area clean and untouched.
Design 11: “Rosy Glow Core”

A soft, romantic take on the “glazed donut” trend. Instead of all-over shimmer, this design focuses it. The core or center of the nail features a soft, blurred gradient of a warm, iridescent rose gold shimmer. This shimmer is most intense in the middle of the nail and softly fades out towards the cuticle and tip, which are left in a sheer, barely-there pink. It looks like a soft, internal glow coming from within the nail.
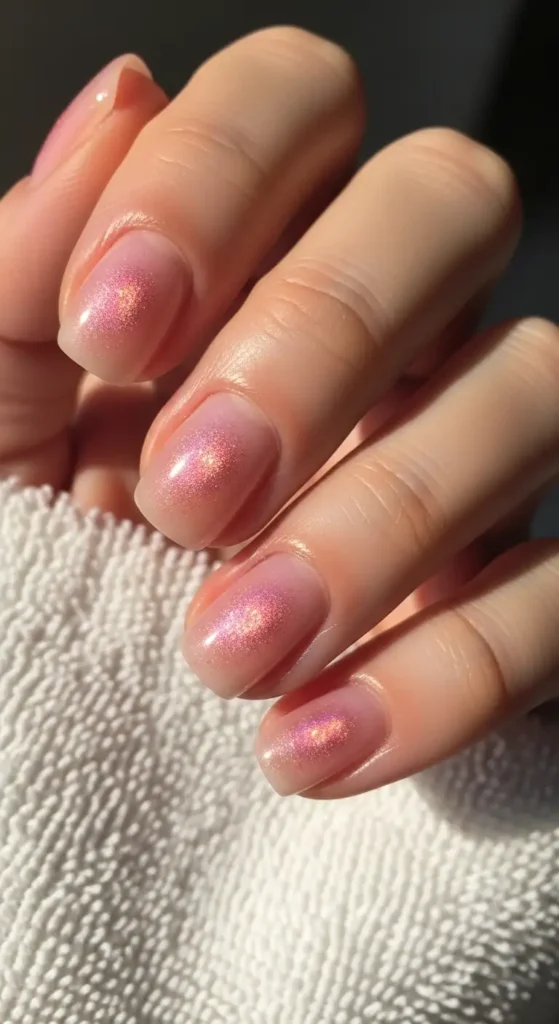
Colors & Application:
- Colors: Sheer Jelly Pink, Rose Gold Iridescent Pigment/Shimmer.
- Application: Apply a coat of sheer pink. While still wet, use a tiny eyeshadow brush to gently dab a small amount of loose rose gold pigment into the center of the nail. Use a patting motion to blur the edges of the pigment outward. Seal with a glossy top coat.
Design 12: “Sage & Lilac Mist”
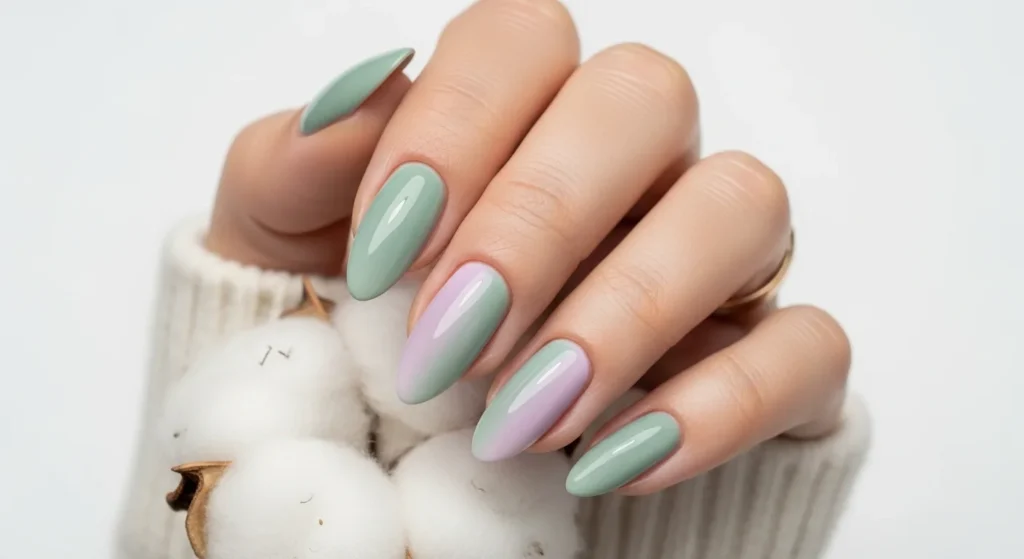
A beautiful and unexpected color pairing. This design uses a soft, dusty sage green at the cuticle, which then blends into a gentle, dusty lilac at the tip. The two colors are from opposite sides of the color wheel, but in their muted, dusty forms, they create a harmonious, calming, and utterly unique gradient. It feels both earthy and floral at the same time.
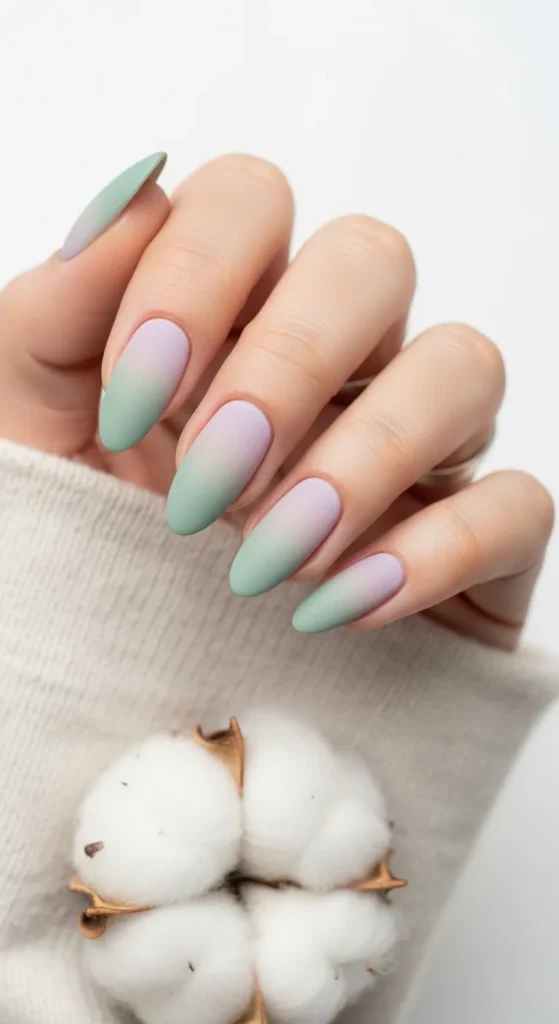
Colors & Application:
- Colors: Dusty Sage Green, Dusty Lilac.
- Application: Apply a white base coat to make the colors pop. Use a damp makeup sponge to pick up both colors side-by-side and dab onto the nail. It may take a couple of layers to achieve the desired opacity and a perfect blend. Finish with a glossy top coat.
Design 13: “Golden Hour Glow”
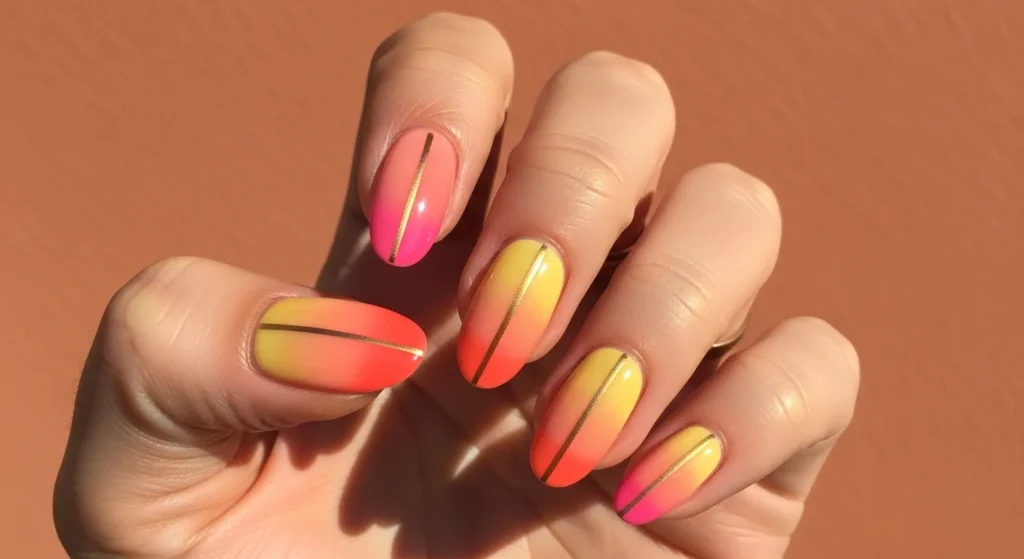
This design captures the warm, radiant light of sunset. The entire nail is a gradient that transitions from a warm, peachy-coral at the cuticle, through a soft, sunlit yellow in the center, and finally into a vibrant, warm pink at the tip. The colors are bright and cheerful, and when they blend, they create a beautiful, golden warmth. A single, thin line of liquid gold foil is placed vertically down the center of the nail for a touch of elegant sparkle.

Colors & Application:
- Colors: Peachy-Coral, Sunlit Yellow, Warm Pink, Gold Foil.
- Application: Sponge on the three colors in sequence. After the gradient is done and top-coated, use tweezers to place a thin strip of gold foil or a gold striping tape down the center. Seal with another top coat.
Design 14: “Black Cherry Soda”
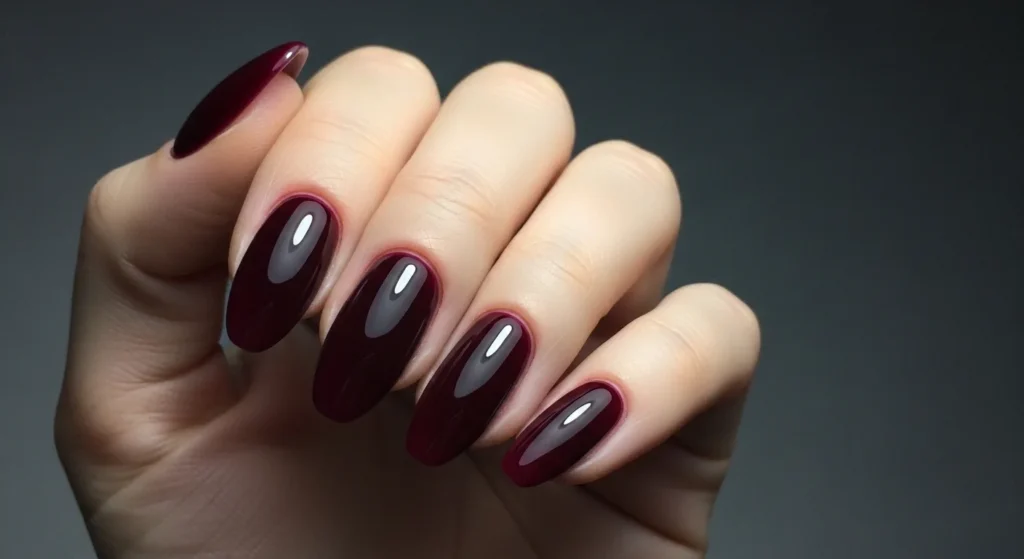
A rich, moody, and glossy design that looks good enough to drink. It features a deep, dark burgundy base that, in the light, reveals a subtle but beautiful gradient. The color is darkest at the cuticle and lightens ever so slightly to a vibrant, translucent cherry red at the very tip, as if light is shining through the edge of the nail. It’s a simple, sophisticated effect that adds depth and dimension to a dark color.
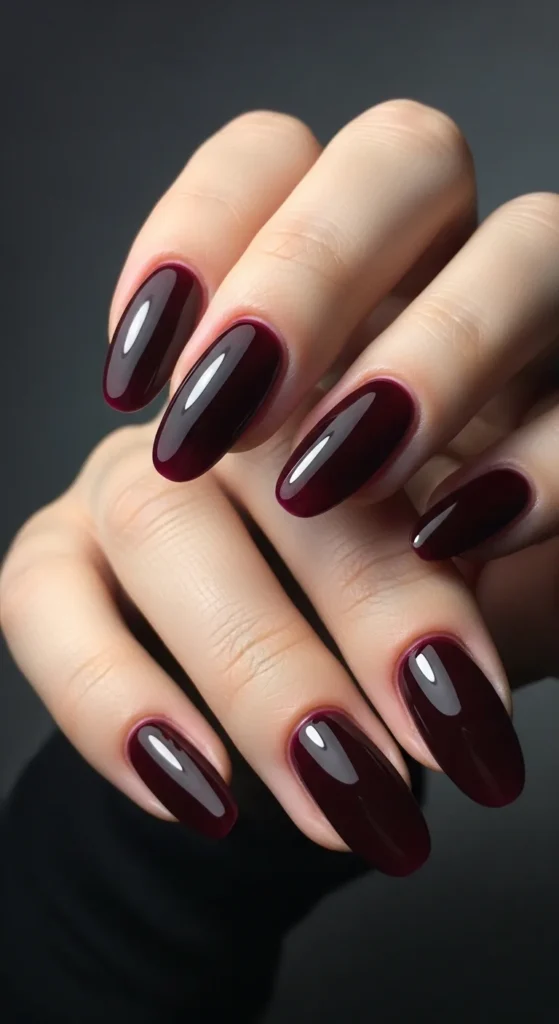
Colors & Application:
- Colors: Deep Burgundy, Translucent Cherry Red.
- Application: Apply a coat of the deep burgundy as a base. Then, mix a tiny amount of the cherry red with clear polish. Using a very soft brush, apply this mixture to the tips and blend it upwards slightly into the burgundy. This creates the illusion of the color lightening towards the edge.
Design 15: “Pastel Patchwork Gradient”
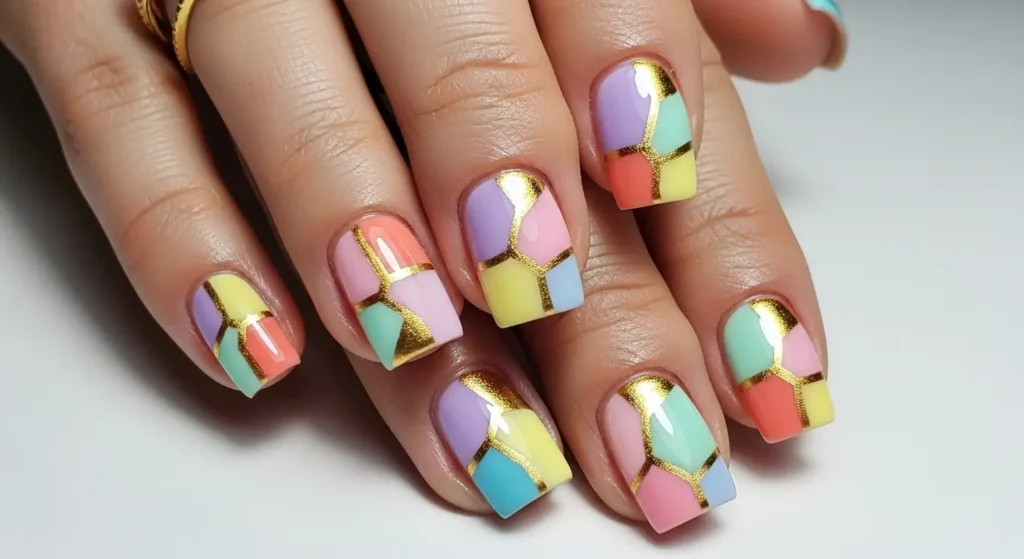
A new, innovative design that combines patchwork and gradient. Each nail is divided into four uneven, abstract “patches” by thin, gold foil lines. Each patch contains its own mini gradient. For example, one patch might fade from soft yellow to peach, another from mint to seafoam, and another from lavender to periwinkle. The colors are all pastel, so the overall effect is cohesive and playful, not chaotic. It’s like a tiny, artistic quilt for your nails.
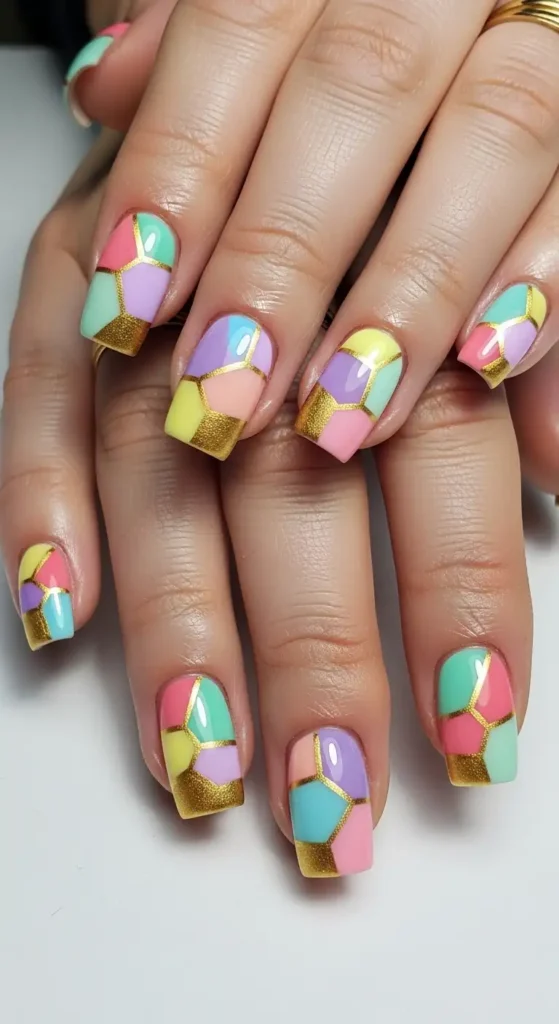
Colors & Application:
- Colors: Assorted pastels (mint, seafoam, yellow, peach, lavender, periwinkle, baby pink, coral), Gold Foil or Stripping Tape.
- Application: This is a more advanced design. First, apply a white base. Using a very fine brush, map out your abstract sections. Then, using a tiny piece of sponge, work on one section at a time, applying the two chosen pastel colors for that section and blending. Cure/dry. Repeat for all sections. Once all gradients are done, carefully apply thin gold foil or striping tape over the lines separating the sections. Seal everything with a glossy top coat.


