Design 1: Sweetheart Blush
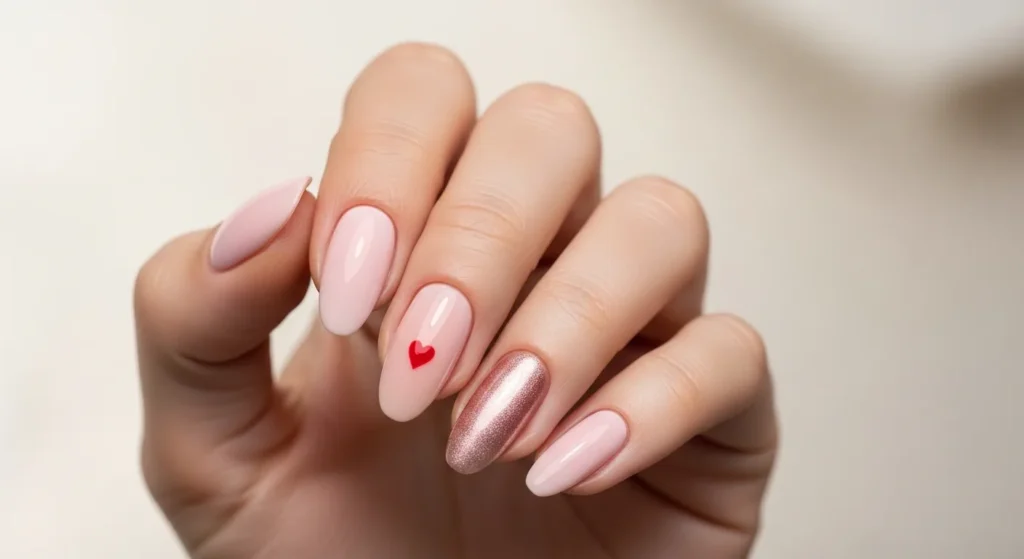
Sweetheart Blush is the perfect embodiment of subtle romance for February. This design features a dreamy combination of baby pink and rose gold that catches the light beautifully throughout the day. Start by applying a nude pink base coat to all nails for a clean canvas. Paint three nails with a creamy baby pink polish in two thin coats for even coverage. On your ring finger, create a gentle gradient using rose gold shimmer polish, starting from the base and fading toward the tip using a makeup sponge for that seamless blend.

The accent nail gets a special touch with a single tiny red heart painted delicately near the cuticle using a fine nail art brush or dotting tool. The colors used are baby pink (soft pastel pink), rose gold shimmer (metallic peachy-gold), nude pink base (natural beige-pink), and classic red for the heart accent. This design is incredibly easy to recreate at home and works beautifully for both casual days and romantic evenings. The subtle shimmer adds just enough glamour without being overwhelming, making it perfect for anyone who loves understated elegance.
Design 2: Winter Rose Garden
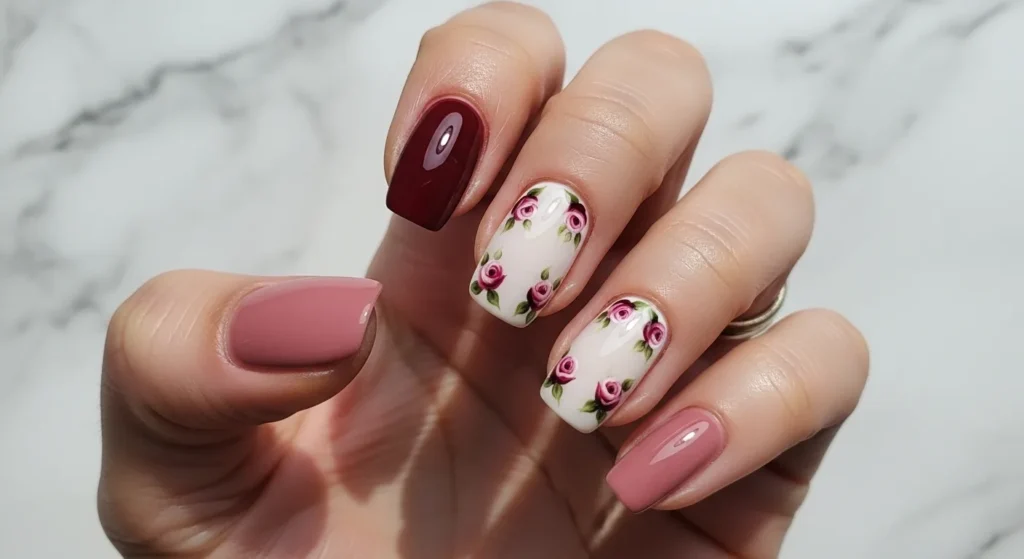
Winter Rose Garden brings the timeless beauty of roses to your fingertips with a sophisticated color palette that feels both cozy and romantic. This design combines dusty rose, burgundy, and off-white tones to create a garden-inspired look that’s perfect for February’s transitional weather. Begin with a clear base coat to protect your natural nails. Apply dusty rose mauve polish to your thumb and pinky nails in two smooth coats. Your index and ring fingers get an off-white creamy base, which serves as the perfect canvas for delicate hand-painted roses.
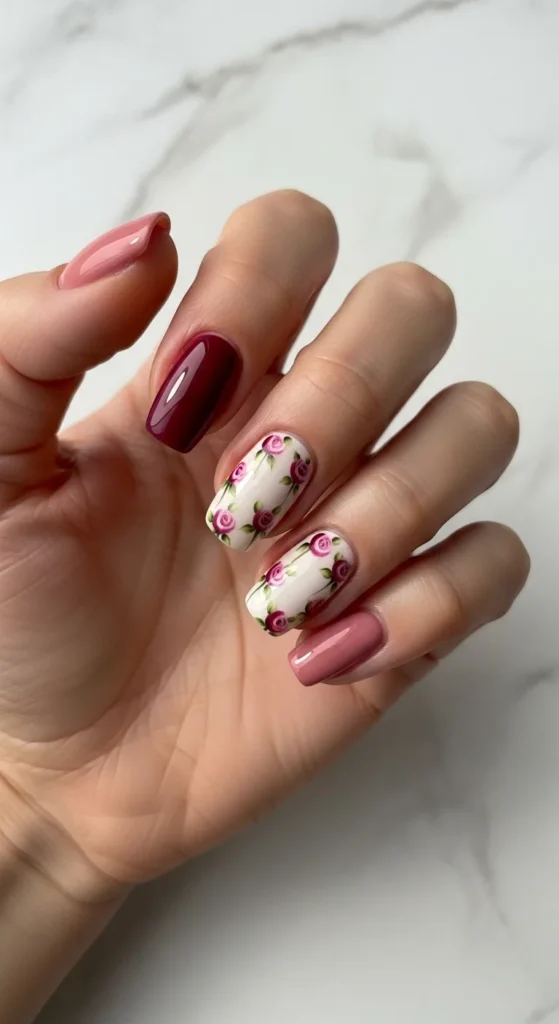
Using a thin nail art brush, create small rose buds in soft pink and deep burgundy shades, adding tiny green leaf accents for dimension. The middle finger is painted in a rich burgundy wine color for dramatic contrast. The colors featured are dusty rose mauve (muted pink-purple), off-white cream (warm ivory), burgundy wine (deep red-purple), soft pink (light rose), and forest green (for leaf details). This design requires a bit more patience for the floral details, but the result is absolutely worth it. You can also use nail stickers or decals if hand-painting feels challenging. The romantic rose motif makes this perfect for date nights, weddings, or any special February occasion.
Design 3: Frosted Valentine

Frosted Valentine perfectly captures the magical meeting point between winter’s icy beauty and Valentine’s warm romance. This design features a stunning combination of pearl white shimmer, soft lavender pink, and baby pink that creates a frosty, ethereal effect. Start by prepping your nails with a base coat for protection and longevity. Apply shimmering pearl white polish with iridescent sparkle to your thumb and middle finger, using two coats for full opacity and maximum shimmer. Your index and ring fingers get a soft lavender pink base in two even coats.
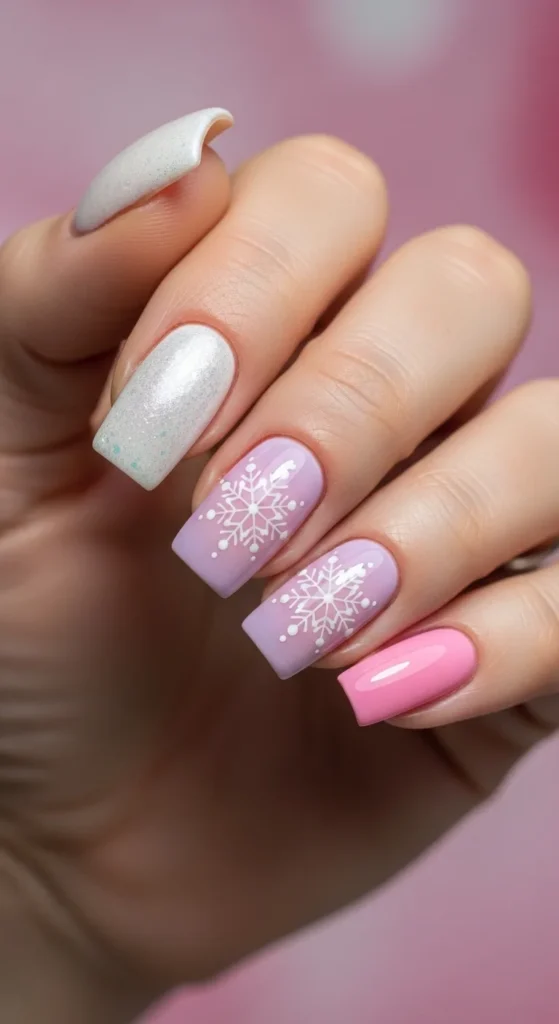
Once completely dry, use a fine nail art brush and white polish to hand-paint delicate snowflake designs in the center of each nail—keep them simple with six points radiating from a center dot. The pinky nail is finished with glossy baby pink polish for a sweet accent. The color palette includes pearl white shimmer (iridescent white with sparkle), lavender pink (soft purple-tinted pink), baby pink (light pastel pink), and pure white (for snowflake details). This design is surprisingly easy despite looking intricate—snowflakes are forgiving shapes that don’t need to be perfect to look beautiful. The frosty shimmer combined with romantic pink tones makes this ideal for anyone who can’t choose between winter vibes and Valentine’s Day spirit.
Design 4: Cupid’s Arrow
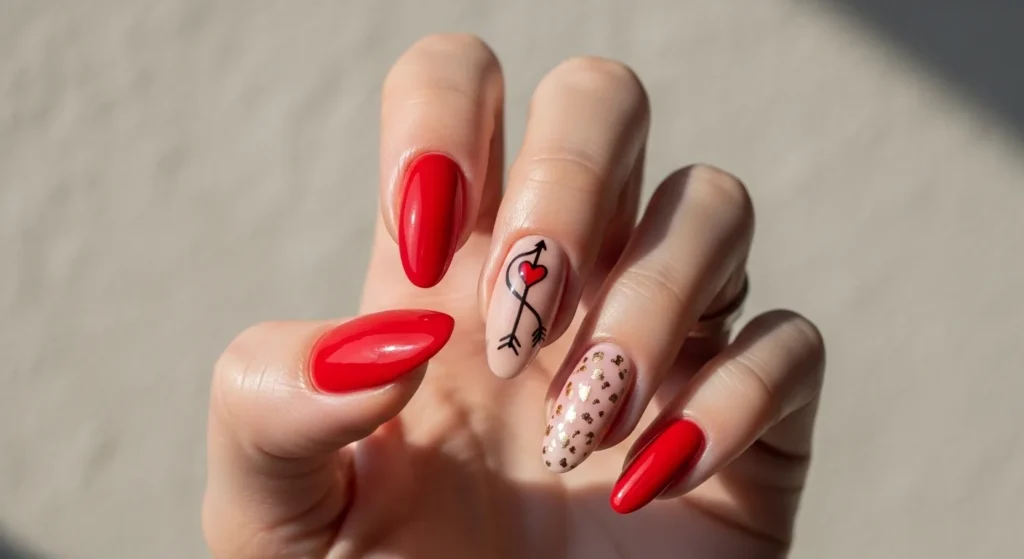
Cupid’s Arrow is a playful and flirty design that celebrates love with a fun twist. This design combines bold cherry red with soft neutrals and a whimsical arrow motif that’s sure to make people smile. Begin with a clear base coat to ensure your manicure lasts longer. Paint your thumb, middle, and pinky nails with classic cherry red cream polish in two coats, making sure to seal the edges for a professional finish. Your index finger serves as the statement nail with a nude beige base and a hand-drawn black arrow. Use a thin nail art brush or striping brush to draw a diagonal line from lower left to upper right, adding a simple arrowhead at one end and a small red heart at the opposite end.
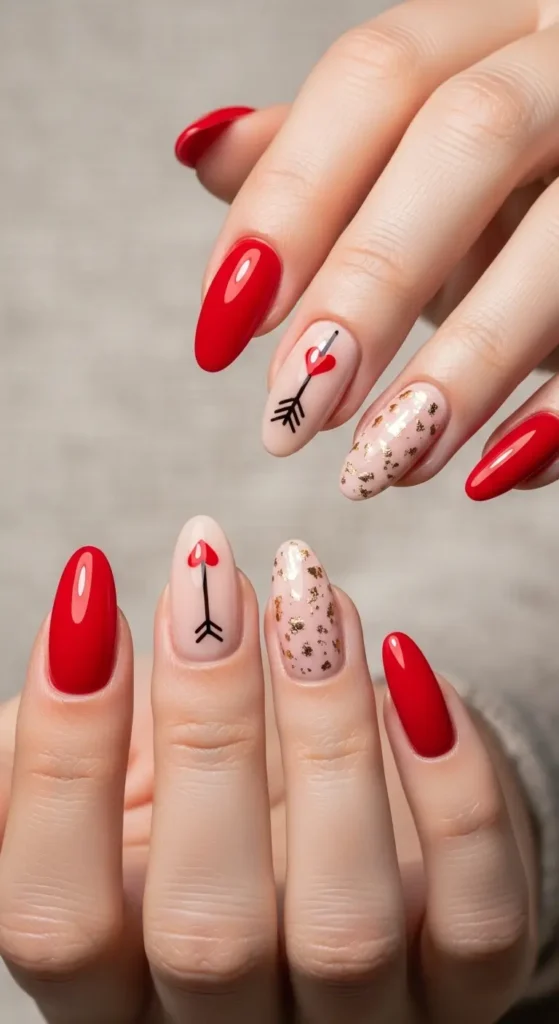
The ring finger gets a soft blush pink base decorated with tiny gold foil flakes applied randomly—simply press them onto tacky polish and seal with a clear top coat. The colors used are cherry red (bright true red), nude beige (warm tan), blush pink (soft peachy-pink), black (for arrow design), and gold foil (metallic accents). This design is fun, romantic, and surprisingly simple to create. The arrow symbolizes Cupid’s love arrow, making it absolutely perfect for Valentine’s Day or any February celebration. The mix of bold and subtle elements creates beautiful balance.
Design 5: Velvet Romance
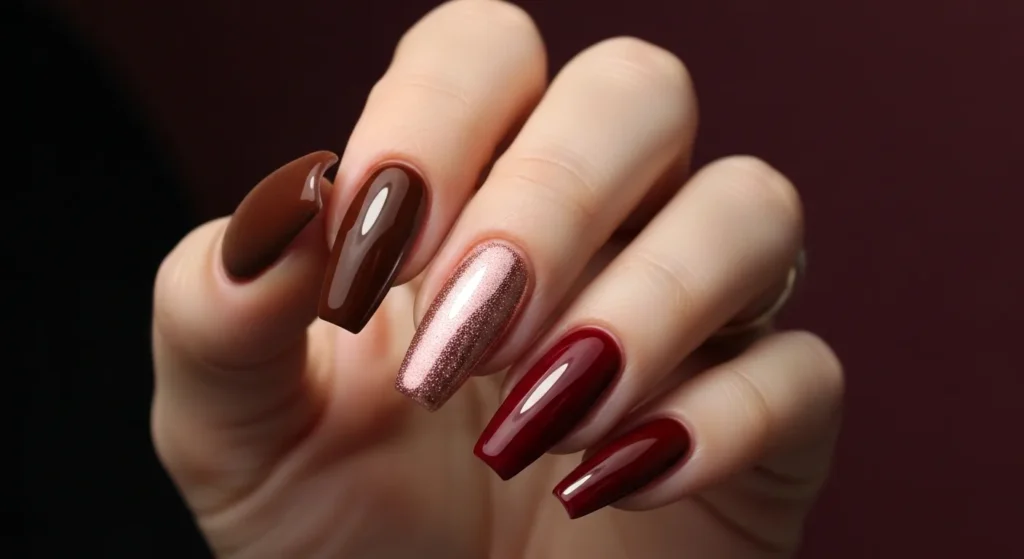
Velvet Romance is a luxurious and sophisticated design that plays with different textures and finishes to create visual interest and depth. This design is all about rich, romantic colors with a modern twist. Start with your base coat for nail health and polish adhesion. For the thumb and ring finger, apply chocolate brown polish in two coats, then finish with a matte top coat to create that velvety texture that looks incredibly expensive. Your index and pinky fingers get deep wine red polish in two glossy coats—make sure to use a high-shine top coat for maximum gloss and dimension.
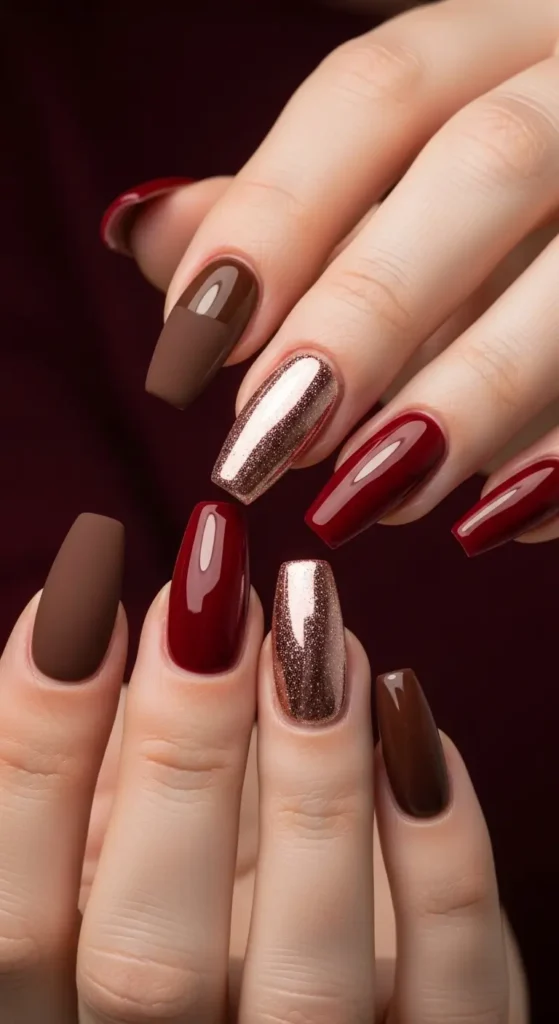
The middle finger is your showstopper: apply a nude pink base, then while slightly tacky, use a silicone applicator or eyeshadow sponge to rub rose gold chrome powder onto the nail surface until you achieve a smooth, reflective mirror finish. Seal everything with appropriate top coats (matte for brown nails, glossy for red nails, and chrome-safe top coat for the metallic nail). The color palette includes chocolate brown (rich dark brown), wine red (deep burgundy-red), nude pink base (natural pink), and rose gold chrome (metallic pink-gold mirror finish). This design looks incredibly complex but is actually quite achievable with the right products. The combination of matte, glossy, and chrome finishes creates a multi-dimensional look that’s perfect for evening events, date nights, or when you want to feel extra special.
Design 6: Love Letter
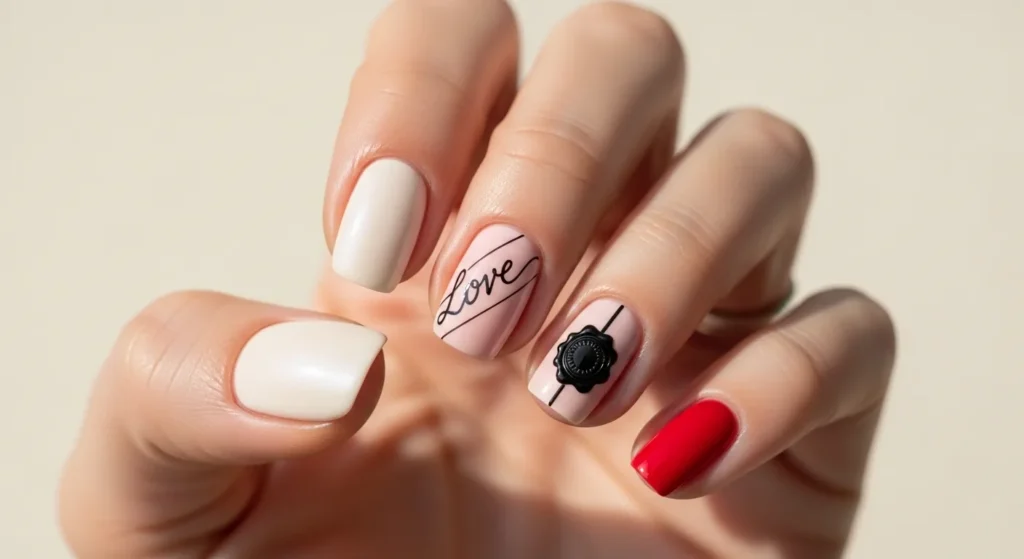
Love Letter is a nostalgic and romantic design inspired by handwritten love notes and vintage correspondence. This elegant design combines soft neutrals with classic red and delicate calligraphy for a timeless look. Begin with a protective base coat on all nails. Apply soft cream ivory polish with a subtle pearl finish to your thumb, index, and pinky nails in two thin coats for a luminous, sophisticated base. The middle finger becomes your love letter canvas: use pale pink as your base color, then once completely dry, carefully write the word “Love” diagonally across the nail using a fine nail art brush and black polish. Practice your cursive on paper first if needed—the beauty is in the handwritten, imperfect charm.
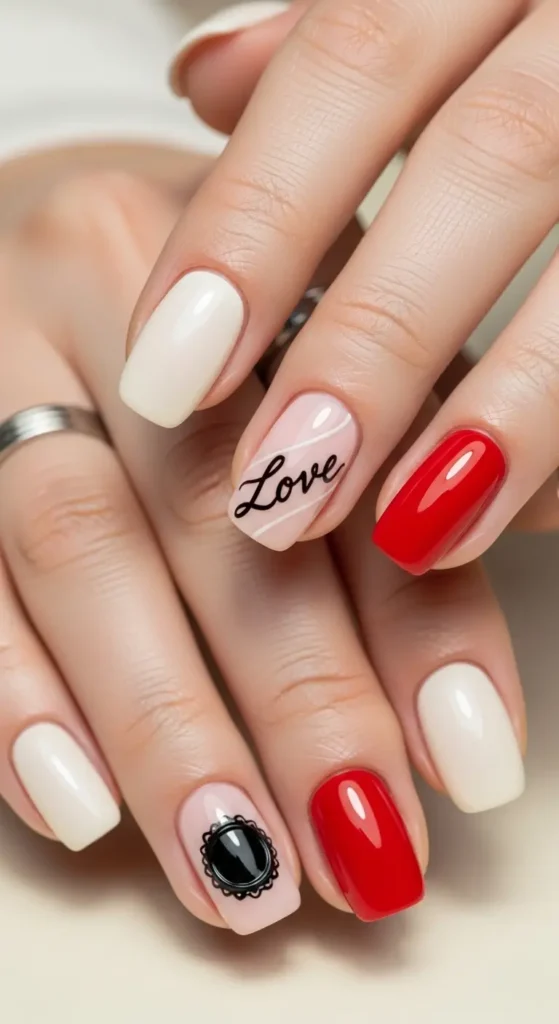
Your ring finger gets two coats of classic red polish, and once dry, create a small circular wax seal design near the base using black polish. Make a small circle and add tiny decorative edges or a simple initial in the center. The colors featured are cream ivory (soft off-white with pearl), pale pink (light blush), classic red (true valentine red), and black (for lettering and seal). This design is perfect for writers, romantics, and anyone who appreciates vintage aesthetics. The handwritten element adds a personal, intimate touch that makes this design truly special for February.
Design 7: February Frost
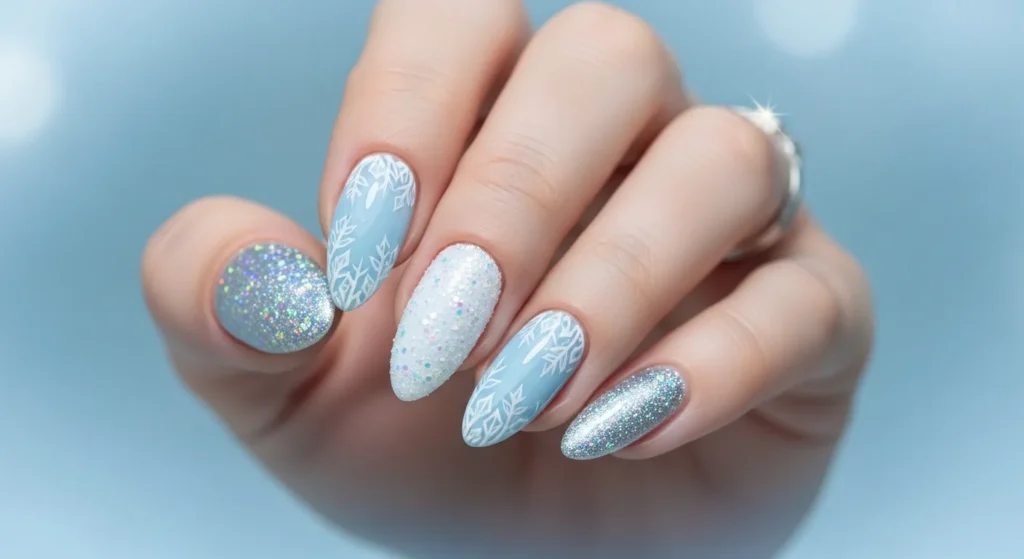
February Frost captures the magical beauty of winter’s final days with an icy, shimmering design that sparkles like fresh snow in sunlight. This design celebrates the cold beauty of February with cool tones and plenty of sparkle. Start with a clear base coat to protect your nails. Apply shimmering silver polish with holographic glitter to your thumb and pinky nails in two coats—the holographic effect will create beautiful rainbow reflections as you move your hands. For your index and ring fingers, use an icy pale blue as your base color in two coats. Once dry, create frost-like patterns along the tips using white polish and a fine brush, making irregular crystalline shapes and branching lines that mimic ice crystals forming on a window.

The middle finger gets a pure white base covered generously with fine iridescent glitter—apply the glitter while the base is still slightly tacky for better adhesion, then seal with a clear top coat. The color palette includes silver holographic (metallic silver with rainbow sparkle), icy pale blue (very light blue with gray undertones), pure white (clean bright white), and iridescent glitter (multi-colored sparkle). This design is perfect for those who love winter and want to celebrate February’s frosty beauty. The combination of shimmer, glitter, and hand-painted frost creates a multi-dimensional winter wonderland on your nails.
Design 8: Heartbeat
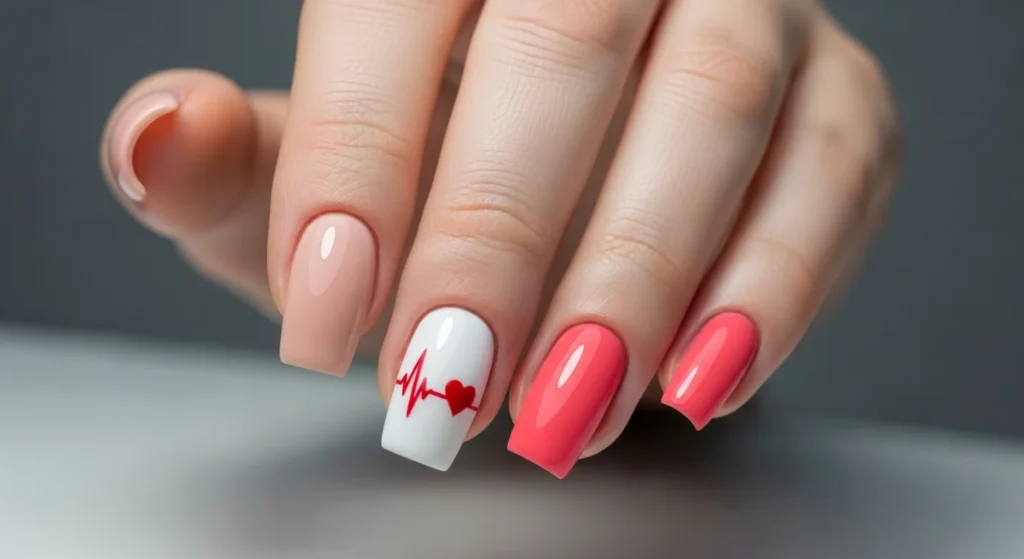
Heartbeat is a modern and meaningful design that symbolizes life, love, and vitality with a creative medical-inspired twist. This design is perfect for healthcare workers, fitness enthusiasts, or anyone who wants to celebrate love in a unique way. Begin with a base coat for nail protection and polish longevity. Paint your thumb, middle, and pinky nails with soft peachy-nude polish in two coats for a natural, elegant base that complements any skin tone. The index finger is your statement nail: apply a white base in two coats for full coverage, then once completely dry, use a thin nail art brush or striping brush to draw a red heartbeat line horizontally across the center of the nail. Create the classic EKG pattern with peaks and valleys, ending with a small solid red heart on one side.
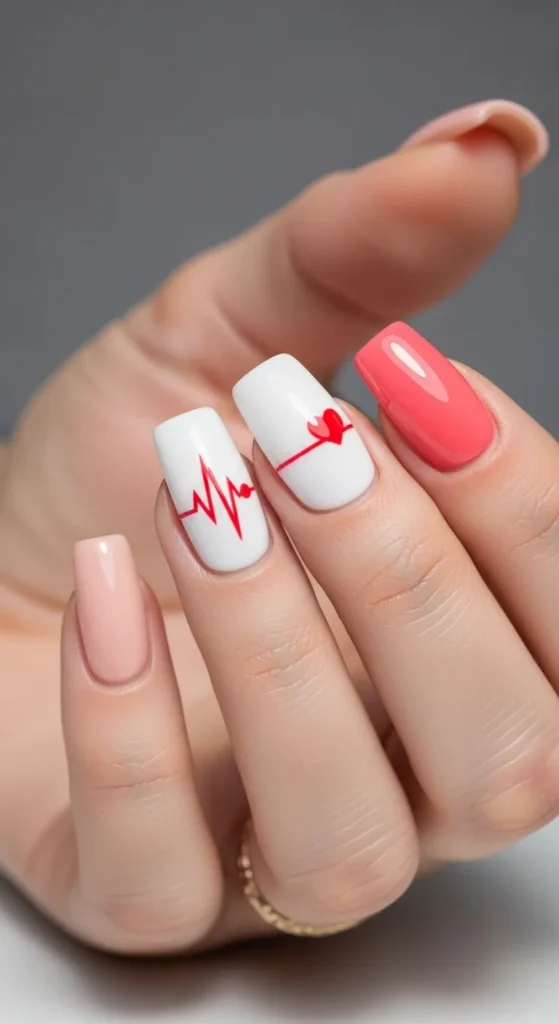
The ring finger gets two coats of vibrant coral pink polish with a glossy top coat for beautiful shine. The colors used are peachy-nude (warm neutral beige with pink undertones), white (clean bright white), red (classic valentine red), and coral pink (warm orange-tinted pink). This design is surprisingly simple to create despite its unique appearance—the heartbeat line doesn’t need to be medically accurate to look amazing. It’s a beautiful way to express that your heart beats for someone special, making it perfect for Valentine’s Day or any day you want to wear your heart on your nails.
Design 9: Candy Hearts
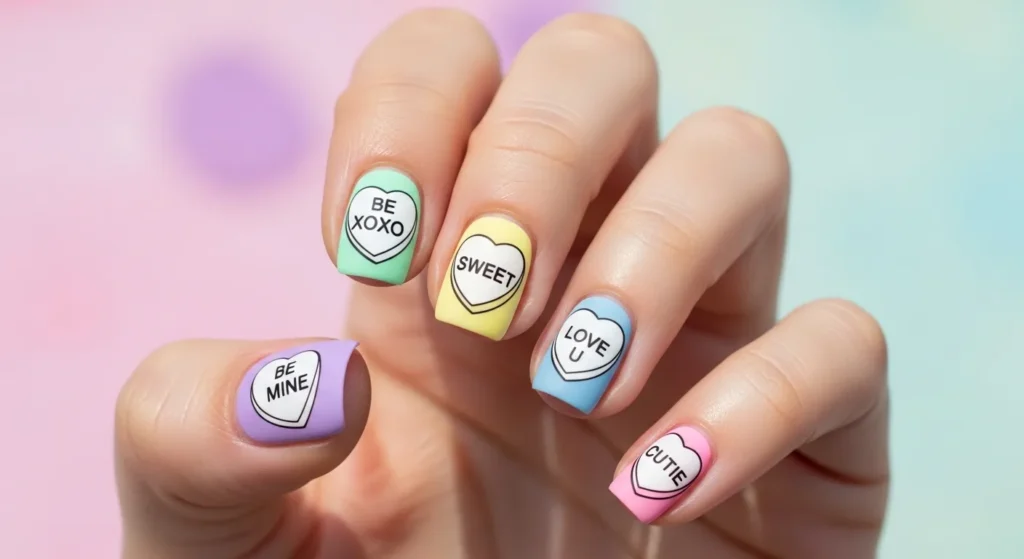
Candy Hearts is a fun, nostalgic design inspired by those classic conversation heart candies we all remember from childhood Valentine’s celebrations. This playful design features rainbow pastels and sweet messages that bring joy and whimsy to your fingertips. Start with a base coat on all nails. Now comes the fun part—paint each nail a different pastel shade: lavender purple on your thumb, mint green on your index finger, pale yellow on your middle finger, baby blue on your ring finger, and soft pink on your pinky. Apply two coats of each color for even coverage. Once completely dry, apply a matte top coat to all nails for that authentic candy texture. Now for the conversation hearts: using white polish and a small dotting tool or brush, create small oval shapes in the center of each nail.

Once the white is dry, use a very fine nail art brush and black polish to write classic candy heart phrases like “Be Mine,” “XOXO,” “Sweet,” “Love U,” and “Cutie” in simple capital letters. The color palette includes lavender purple, mint green, pale yellow, baby blue, soft pink, white (for candy shapes), and black (for text). This design requires patience for the lettering but the result is absolutely adorable. You can also use nail stickers with conversation heart designs if hand-lettering feels challenging. This design is perfect for anyone who loves cute, playful nail art and wants to bring a smile to everyone who sees their nails.
Design 10: Midnight Romance

Midnight Romance is a dramatic and sophisticated design that captures the mystery and beauty of a romantic night under the stars. This design is perfect for evening events, date nights, or anyone who loves bold, dark nail art. Begin with a base coat to protect your natural nails, especially important with dark polishes. Paint your thumb and pinky nails with deep navy blue shimmer polish in two to three coats for full opacity—the subtle shimmer adds depth without being too flashy. For your index and ring fingers, apply black polish as your base in two coats. Once completely dry, use a silver polish or nail art pen to create constellation designs: make small dots for stars and connect some of them with thin lines to form simple constellation patterns like the Big Dipper or Orion’s Belt.
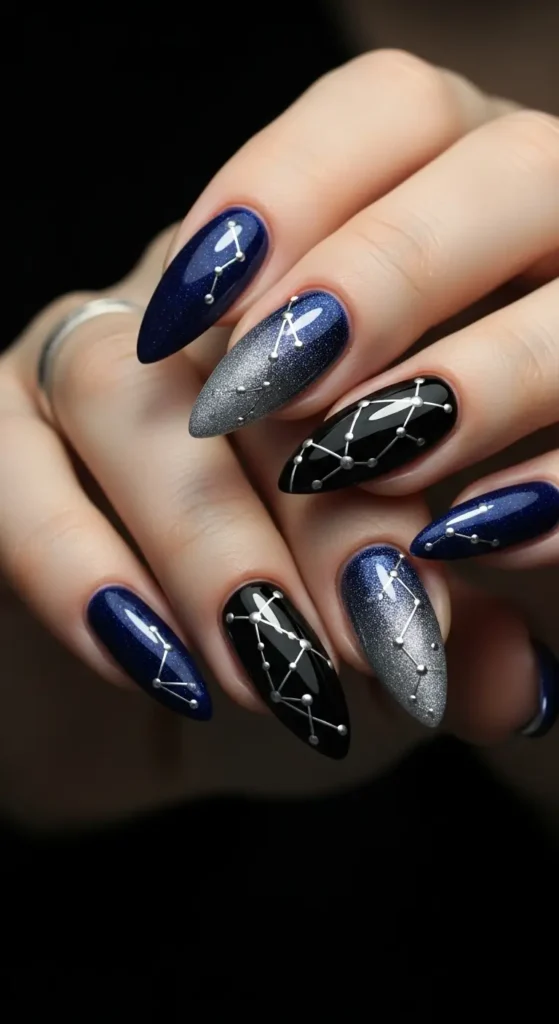
The middle finger is your gradient masterpiece: start with navy blue at the base and use a makeup sponge to blend shimmering silver polish toward the tip, creating a seamless transition that mimics the night sky meeting the horizon. Seal everything with a glossy top coat. The colors featured are deep navy blue (dark blue with shimmer), black (true black), shimmering silver (metallic light silver), and the gradient combines both navy and silver. This design looks complex but the techniques are quite forgivable—constellations don’t need to be astronomically accurate to look stunning. The dark, romantic palette makes this perfect for February’s cozy evenings and adds an air of mystery and elegance to any outfit.
Design 11: Cherry Blossom Preview

Cherry Blossom Preview celebrates the promise of spring that February brings, featuring delicate floral art that hints at warmer days ahead. This design combines soft whites and pinks with hand-painted cherry blossoms for an elegant, feminine look. Start with a clear base coat on all nails. Apply soft white cream polish to your thumb, index, and pinky nails in two smooth coats for a clean, fresh base. The middle finger becomes your cherry blossom canvas: use a very pale pink as your base, then once dry, paint delicate cherry blossom branches using a thin nail art brush and brown polish. Create thin, curved lines representing branches, then add small five-petal flowers in soft pink along the branches—keep the flowers small and scattered for a natural look.
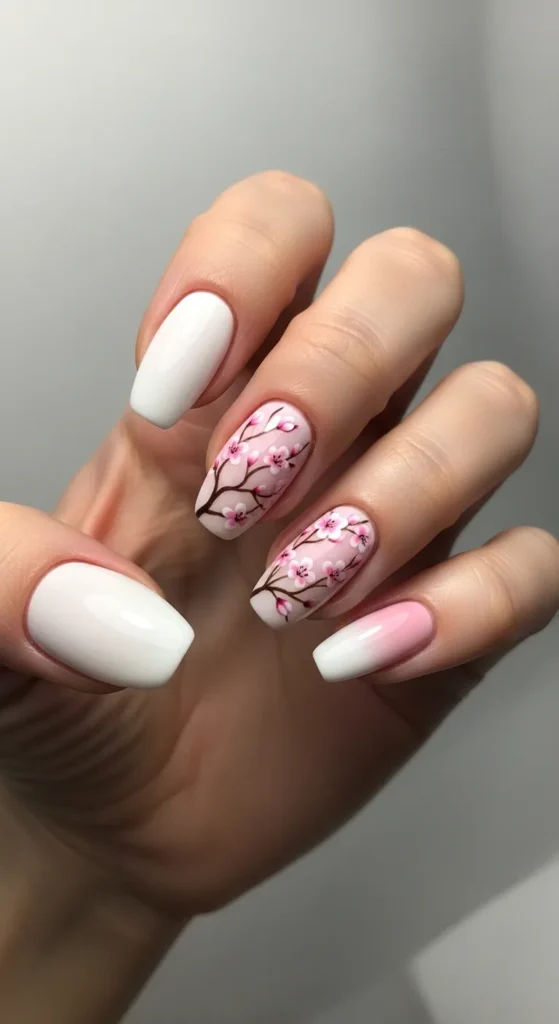
Add tiny dots of white or yellow in the flower centers for detail. The ring finger features a beautiful gradient: start with white at the base and use a makeup sponge to blend soft blush pink toward the tip, creating a subtle ombre effect. Seal everything with a glossy top coat. The color palette includes soft white cream (warm off-white), very pale pink (almost white pink), brown (for branches), soft pink (for flowers), blush pink (for gradient), and white/yellow (for flower centers). This design requires a steady hand for the floral details but the result is breathtaking. Cherry blossoms symbolize renewal and beauty, making this perfect for late February when we start dreaming of spring.
Design 12: Love Potion
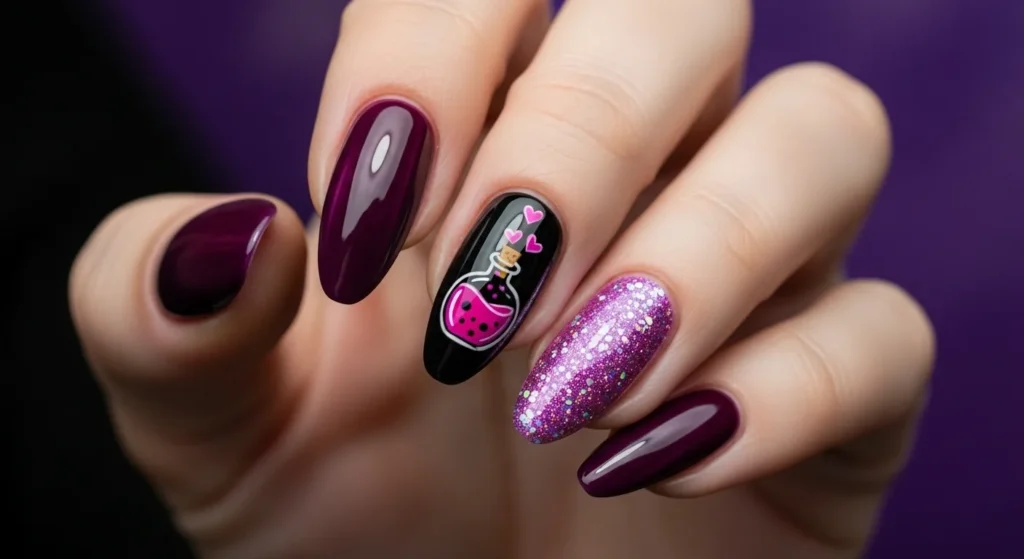
Love Potion is a whimsical and magical design that combines mystery and romance with a playful fantasy twist. This design is perfect for anyone who loves unique, creative nail art with a story to tell. Begin with a protective base coat on all nails. Paint your thumb and ring finger with deep plum purple polish in two coats, then finish with an extra glossy top coat to create that liquid, potion-like shine that catches the light beautifully. Your index and pinky fingers get shimmering magenta pink polish with holographic glitter—apply two coats for full sparkle coverage. The holographic effect creates a magical, color-shifting sparkle that looks absolutely enchanting. The middle finger is your storytelling nail: apply black polish as your base in two coats for full opacity. Once dry, use a fine nail art brush to paint a small potion bottle in the center using pink polish—create a simple bottle shape with a rounded bottom and narrow neck, add a small cork at the top, and paint tiny heart shapes floating above the bottle as if magical love vapor is escaping.

You can outline the bottle with white or silver for definition. Seal everything with a glossy top coat. The colors used are deep plum purple (rich dark purple), magenta pink holographic (bright pink with rainbow sparkle), black (for accent nail base), and pink (for potion bottle design). This design is fun, creative, and perfect for anyone who believes in the magic of love. The combination of dark, mysterious colors with bright, magical sparkle creates beautiful contrast and makes this design truly special for February.
